Understanding the Highway Code: Essential Chapters for Learners
Learning to drive can feel overwhelming, but the UK Highway Code serves as your trusted companion throughout this exciting journey. The Highway Code provides essential rules, guidance, and safety information that every road user needs to know, making it absolutely crucial for passing both your theory test and practical driving exam. Whether you’re walking, cycling, or getting behind the wheel for the first time, understanding these fundamental principles will keep you safe and confident on British roads.
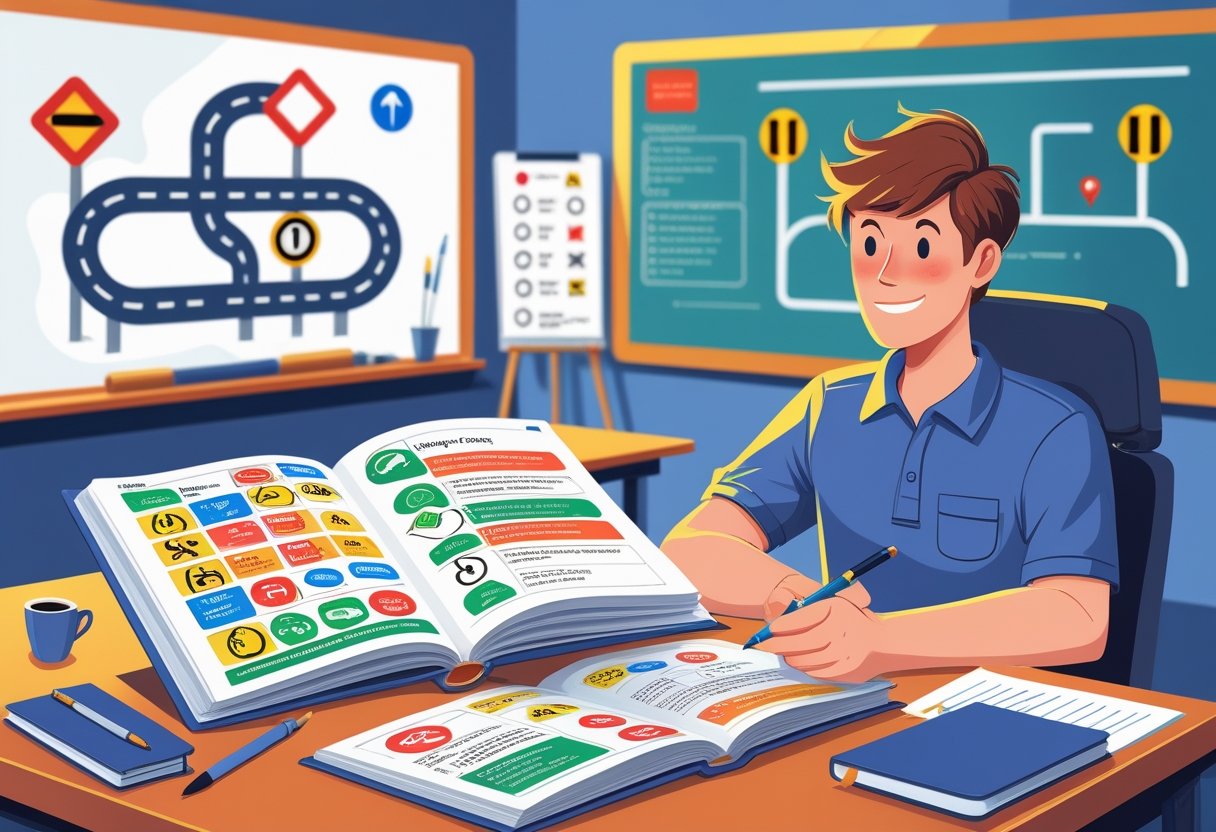
We’ve all been there: staring at hundreds of rules and wondering where to start. The good news is that you don’t need to memorise every single detail straight away. By focusing on the most important chapters and understanding how different road users interact with each other, you’ll build a solid foundation that grows stronger with practice.
From the hierarchy of road users to essential traffic signs and road markings, we’ll guide you through the key areas that matter most for new drivers. You’ll discover practical insights about pedestrian safety, cycling rules, and the driving regulations that form the backbone of safe motoring in the UK. By the end of this guide, you’ll feel ready to tackle your theory test with confidence and apply your knowledge in real-world driving situations.
Why the Highway Code Matters for Every Road User
The UK Highway Code serves as the foundation for safe road use across England, Scotland, and Wales. It protects everyone from serious accidents whilst establishing clear legal responsibilities for all road users.
Who Needs to Know the Highway Code
The Highway Code applies to far more people than you might think. Essential reading for all road users includes drivers, motorcyclists, cyclists, pedestrians, and horse riders.
Road Users Required to Follow the Highway Code:
- Drivers of all motor vehicles
- Motorcyclists and moped riders
- Cyclists on roads and cycle paths
- Pedestrians crossing roads and walking
- Horse riders and horse-drawn vehicles
- Mobility scooter users and powered wheelchair users
We often forget that pedestrians need to understand road rules too. When you’re walking near traffic or crossing busy roads, knowing the proper procedures keeps you safe.
Mobility scooter users and powered wheelchair users face unique challenges on pavements and roads. The Highway Code provides specific guidance for these situations.
Even if you’re not driving yet, understanding these rules helps you become a better road user. You’ll recognise dangerous situations faster and make smarter decisions.
Consequences of Not Following the Rules
Breaking Highway Code rules can lead to serious legal and financial penalties. Not all rules carry the same legal weight, but many violations result in penalty points, fines, or worse.
Common Penalties Include:
- Penalty points on your licence (3-11 points typical)
- Fixed penalty notices (£100-£200 for most offences)
- Court appearances for serious violations
- Driving bans for accumulating 12+ points
- Increased insurance premiums following convictions
New drivers face stricter consequences under the New Drivers Act. If you receive six penalty points within two years of passing your test, you’ll lose your licence completely.
Some Highway Code violations can result in criminal charges. Dangerous driving, drink driving, or causing accidents through negligence carry severe penalties including prison sentences.
Even minor infractions affect your driving record. Insurance companies check for violations and increase premiums accordingly, costing you hundreds of pounds annually.
Role of the Highway Code in Road Safety
The primary aim of the Highway Code is to enhance safety on the road whilst supporting efficient transport systems across the UK.
The rules create predictable behaviour patterns amongst all road users. When everyone follows the same guidelines, we can anticipate what others will do next.
Key Safety Benefits:
- Reduces accident rates through standardised procedures
- Protects vulnerable road users like cyclists and pedestrians
- Establishes clear right-of-way rules at junctions
- Sets appropriate speed limits for different road types
First introduced in 1931, the Highway Code has evolved continuously to address new safety challenges and vehicle technologies.
Modern updates include guidance on electric vehicles, updated mobile phone laws, and improved protection for cyclists and pedestrians. The hierarchy of road users now prioritises those most at risk.
Understanding these safety principles helps you make better decisions in complex traffic situations. You’ll spot potential hazards earlier and react more appropriately to unexpected events.
The rules work best when everyone knows them properly. That’s why thorough Highway Code knowledge benefits not just you, but every person sharing the roads with you.
The Hierarchy of Road Users Explained
The hierarchy of road users concept puts those most at risk at the top, creating clear responsibilities for protecting vulnerable people on our roads. This system means drivers of larger vehicles must take extra care around pedestrians, cyclists, and horse riders, whilst everyone shares responsibility for mutual respect and safety.
New Priorities and Responsibilities
The Highway Code’s 2022 update introduced a structured approach to road safety that fundamentally changes how we think about responsibility. Those who can cause the greatest harm now bear the greatest responsibility for reducing danger to others.
The hierarchy order places:
- Pedestrians (especially children, older adults, and disabled people) at the top
- Cyclists in second position
- Horse riders third
- Motorcyclists fourth
- Car drivers and larger vehicle operators at the bottom
This doesn’t mean pedestrians can walk anywhere without looking. Instead, it means we as drivers must be extra vigilant around more vulnerable road users.
The system works both ways too. Cyclists have responsibilities towards pedestrians, just as we have responsibilities towards cyclists. It’s about creating a chain of care that protects everyone.
Protecting the Most Vulnerable
Understanding why certain road users need extra protection helps us become better, more considerate drivers. Pedestrians, mobility scooter users, and cyclists have no protective shell around them like we do in our cars.
Key protection measures include:
- Leaving at least 1.5 metres when overtaking cyclists at speeds up to 30mph
- Passing horse riders at under 10mph with at least 2 metres space
- Giving way to pedestrians waiting to cross at junctions
- Always stopping for people on zebra crossings
Children and older adults deserve particular attention because they might not judge distances and speeds as accurately. Disabled pedestrians may need extra time to cross roads safely.
We must remember that a minor mistake that might cause a small dent in our car could seriously injure someone walking or cycling. That’s why the responsibility sits firmly with us as drivers.
Shared Space: Mutual Respect in Action
The hierarchy concept emphasises mutual respect rather than giving certain road users absolute priority in every situation. We’re all working together to make journeys safer for everyone.
Practical examples of shared responsibility:
- Cyclists should ride considerately and allow overtaking when safe
- Horse riders must follow traffic rules and signal clearly
- Pedestrians should use crossings where available and stay alert
- Motorcyclists need to be visible and predictable in their movements
This approach means we don’t just follow rules mechanically. Instead, we actively look out for each other and adjust our behaviour based on the situation.
When we see a nervous cyclist ahead, we give them extra space and time. If there’s a family with young children near the kerb, we slow down and stay alert. It’s about reading the road and responding with genuine care for fellow human beings sharing the same space.
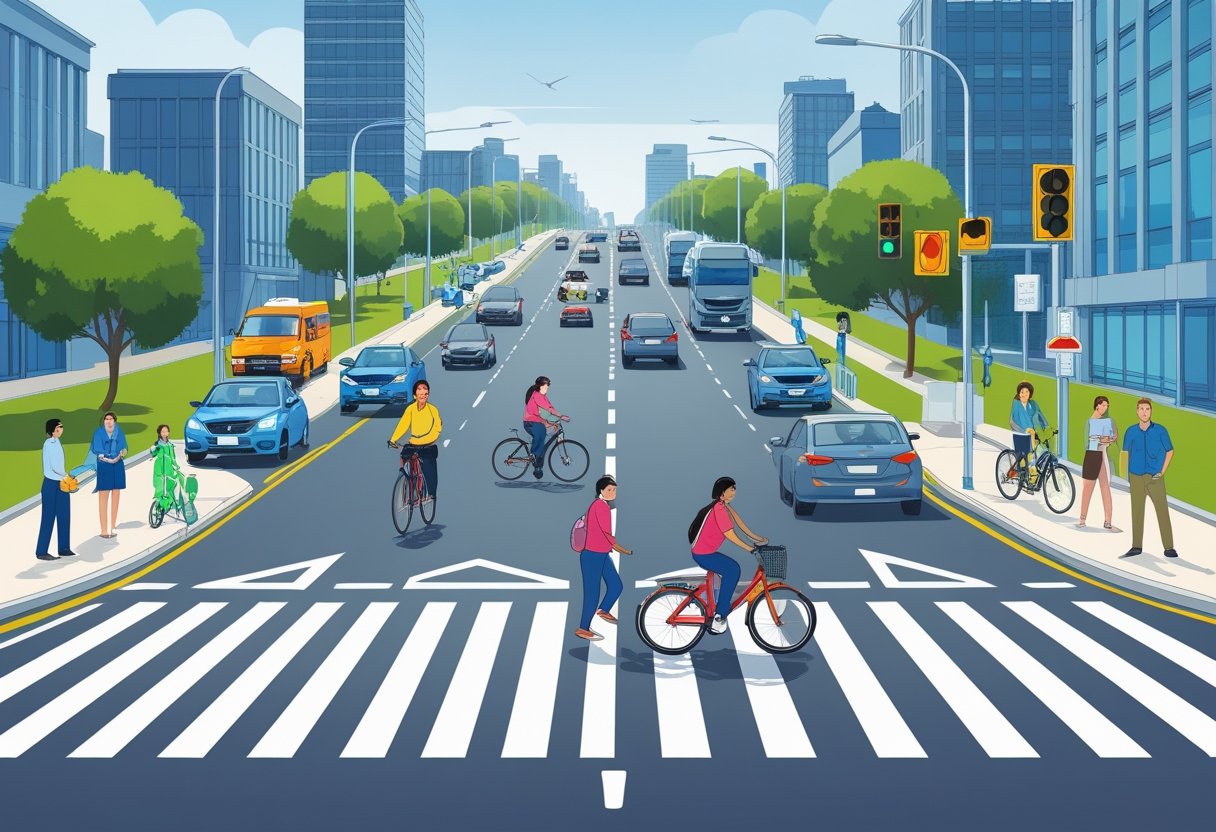
Key Rules for Pedestrians, Cyclists, and Other Road Users
The roads belong to everyone, and understanding how different groups share this space safely makes all the difference. We’ll explore the fundamental rules that keep pedestrians secure on pavements and crossings, ensure cyclists navigate traffic confidently, and help horse riders maintain safety alongside modern vehicles.
Essential Guidance for Pedestrians
Walking might seem straightforward, but pedestrian safety rules form the foundation of road safety for everyone. Let’s break down what really matters.
Using Pavements and Footways
Always stick to pavements when they’re available. If you must step into the road, look both ways first and stay alert to your surroundings.
When there’s no pavement, keep to the right-hand side so you can see oncoming traffic. Walk in single file on narrow roads and stay close to the roadside.
Visibility Matters
Wear bright or light-coloured clothing during poor daylight. At night, reflective materials like armbands or jackets help drivers spot you up to three times further away than regular clothing.
Safe Crossing Techniques
The Green Cross Code remains your best friend. Find a safe crossing point where you can see clearly in all directions, ideally using designated crossings.
Stop before the kerb, look and listen for traffic from all directions, wait for a safe gap, then cross straight across without running.
At Zebra Crossings
Give traffic plenty of time to see you before stepping out. Wait until vehicles have stopped from both directions before crossing. Remember, traffic must give way to pedestrians on zebra crossings, but they need time to stop safely.
Safe Conduct for Cyclists
Cycling brings freedom and responsibility in equal measure. The rules help you navigate confidently whilst respecting other road users.
Road Positioning and Cycle Lanes
Use cycle lanes when available, but remember you’re not legally required to stick to them. Position yourself clearly where drivers can see you, typically around one metre from the kerb.
At Junctions and Roundabouts
Take extra care at junctions where many accidents happen. Make eye contact with drivers when possible and use clear hand signals to communicate your intentions.
Watch for vehicles turning left across your path, a common cause of cycling incidents.
Sharing Space with Pedestrians
Routes shared with pedestrians require mutual respect. On shared paths, give pedestrians plenty of space and use your bell politely to alert them of your presence.
Slow down around children, elderly people, and anyone with mobility challenges.
Equipment and Visibility
Your bike needs working brakes, lights after dark, and a bell or horn. Wear a properly fitted helmet and bright clothing to help others spot you easily.
Consider reflective gear for early morning or evening rides.
Rules for Horse Riders and Animal Handlers
Horse riders face unique challenges on modern roads. Safety depends on preparation, positioning, and clear communication with other road users.
Road Position and Movement
Ride in single file and keep to the left, but move out when necessary to avoid hazards. Signal your intentions clearly and thank considerate drivers with a smile or wave.
Never ride more than two abreast, and switch to single file when traffic approaches.
Protective Equipment
Always wear a properly fitted, up-to-date riding hat. Bright, reflective clothing helps drivers spot you from a distance, especially during poor light conditions.
Consider fluorescent tabards for both you and your horse.
Communication with Traffic
Use clear hand signals and make yourself as visible as possible. If your horse becomes startled, try to move to a safe position away from traffic.
Leading Animals
When leading horses or other animals, keep them on the side away from traffic. Use the shortest practical route and avoid busy roads during peak hours.
Special Considerations
Mobility scooter users and powered wheelchair users share many rules with pedestrians but have additional considerations for their equipment and speed capabilities on pavements and designated paths.
Rules All Drivers and Motorcyclists Must Know
Whether you’re behind the wheel of a car or riding a motorbike, we’ll explore the fundamental rules that keep everyone safe on our roads. These core principles cover how we communicate through signals, maintain safe speeds and stopping distances, navigate special road situations, and use lighting effectively.
Signals and Markings: Communicating on the Road
Clear communication between road users prevents accidents and keeps traffic flowing smoothly. We rely on a combination of vehicle signals, road markings, and traffic signs to share our intentions with other drivers and motorcyclists.
Hand signals remain essential, especially when your indicators fail. The basic signals include extending your right arm horizontally for right turns, raising your right arm vertically for slowing down, and extending your right arm downward for left turns.
Modern vehicles use indicator lights as the primary signalling method. We must signal in good time before manoeuvring, but not so early that it confuses other road users. Cancel indicators after completing your manoeuvre.
Road markings provide crucial information about lane usage and restrictions. White lines separate traffic lanes, whilst yellow lines indicate parking restrictions. Understanding road markings and traffic signs helps us navigate complex junctions and roadworks safely.
Traffic lights follow a standard sequence: red (stop), red and amber together (prepare to go), green (go if safe), and amber (stop unless unsafe to do so). We must always come to a complete stop at red lights.
Speed Limits and Safe Stopping Distances
Speed limits protect all road users by ensuring vehicles travel at safe speeds for different road conditions. Built-up areas typically have 30mph limits, whilst single carriageways allow 60mph and dual carriageways permit 70mph.
Motorcyclists follow the same speed limits as cars, though their smaller size and different braking characteristics require extra attention to stopping distances. Weather conditions dramatically affect these distances.
The two-second rule helps maintain safe following distances in good conditions. Choose a fixed point ahead, and ensure at least two seconds pass between the vehicle in front reaching it and you reaching the same spot.
In wet conditions, we need to double this distance to four seconds. Icy conditions require up to ten times the normal stopping distance. Highway Code rules for safe driving practices emphasise adjusting speed according to visibility and road conditions.
Thinking distance plus braking distance equals total stopping distance. At 30mph, this totals about 23 metres (75 feet) in good conditions.
Driving in Special Situations: Level Crossings, Roadworks, and One-Way Streets
Special road situations require heightened awareness and specific procedures to ensure everyone’s safety. Level crossings demand particular caution because trains cannot stop quickly.
Always stop at red lights at level crossings, even if no train is visible. Never zigzag around barriers or attempt to cross when warning lights flash. If your vehicle breaks down on the crossing, get everyone out immediately and use the railway telephone.
Roadworks create temporary changes to normal traffic patterns. Reduced speed limits in these areas protect both workers and drivers. Merge in turn when lanes close, and maintain extra following distance on temporary surfaces.
Contraflow systems in roadworks put opposing traffic very close together. Keep well within your lane markers and avoid overtaking unless signs specifically permit it.
One-way streets require careful observation before entering. Look for road signs and markings that indicate traffic direction. Parking regulations often differ on one-way streets, with restrictions varying by time and side of the road.
Pay attention to bus lanes and cycle lanes within one-way systems, as these might allow movement in different directions from general traffic.
Using Lights, Headlights, and Visibility Aids
Proper lighting ensures we can see clearly and remain visible to other road users in various conditions. Headlights serve dual purposes: illuminating the road ahead and making our presence known to others.
Use dipped headlights when visibility is seriously reduced, typically when you cannot see more than 100 metres ahead. This includes fog, heavy rain, and snow conditions, not just during darkness.
Full beam headlights help on unlit roads but must be dipped when approaching oncoming traffic or following another vehicle. The glare can blind other drivers and motorcyclists, creating dangerous situations.
Fog lights should only be used when visibility drops below 100 metres. Many drivers forget to switch them off when conditions improve, which can dazzle other road users unnecessarily.
Motorcyclists benefit from keeping dipped headlights on during daylight hours, as this significantly improves their visibility to other traffic. Modern bikes often have automatic daytime running lights.
Hazard warning lights indicate temporary obstruction or breakdown. Use them sparingly and only when your vehicle poses a hazard to other traffic. They shouldn’t be used while driving except in specific circumstances like queuing traffic on motorways.
Understanding Traffic Signs, Road Markings, and Vehicle Markings
Traffic signs tell us what to do, road markings guide our path, and vehicle markings help us identify different types of transport. These visual cues work together to keep everyone safe and traffic flowing smoothly.
Decoding Common Traffic Signs
We encounter hundreds of different signs on UK roads, but they all fall into clear categories that make learning easier. Traffic signs giving orders use circular shapes and bold colours to tell us what we must or mustn’t do.
Red circular signs with white backgrounds mean “don’t do this.” Think of the classic no entry sign or speed limit circles. Blue circular signs give us positive instructions like “turn left” or “cyclists only.”
Warning signs use triangular shapes with red borders. These alert us to hazards ahead like sharp bends, school crossing patrol areas, or level crossings. The yellow diamond signs at level crossings deserve special attention because trains can’t stop quickly.
Direction signs vary by road type:
- Green signs for motorways
- Blue signs for A-roads
- White signs for local routes
- Brown signs for tourist attractions
Road works signs use yellow backgrounds to grab our attention. When we see these, we need to reduce speed and follow temporary signals or flaggers.
Reading Road and Vehicle Markings
Road markings speak to us through lines, symbols, and colours painted on the tarmac. White lines are the most common, but their patterns tell different stories.
Solid white lines mean we can’t overtake or change lanes. Broken white lines allow us to cross when it’s safe. The longer the gaps between broken lines, the safer it is to overtake.
Yellow lines control parking and stopping. Single yellow lines restrict parking during certain hours, while double yellow lines mean no parking at any time.
Zebra crossings have distinctive black and white stripes with flashing Belisha beacons. We must give way to pedestrians who’ve stepped onto the crossing. The zigzag lines before zebra crossings mean no overtaking or parking.
Vehicle markings help us identify different types of transport. School buses display “SCHOOL” signs, emergency vehicles have reflective chevrons, and long vehicles show red and yellow diagonal stripes at the rear.
Legal Compliance at Junctions and Crossings
Junctions test our knowledge of multiple signs and markings working together. Stop signs with solid white lines mean we must come to a complete halt, even if the road looks clear.
Give way signs use triangular shapes pointing downward with broken white lines across the road. We must give priority to traffic on the main road but don’t need to stop if it’s clear.
Box junctions have yellow criss-cross markings. We can’t enter unless our exit is clear, preventing us from blocking the junction. The only exception is when turning right and we’re only stopped by oncoming traffic.
At zebra crossings, the law requires us to stop for pedestrians who’ve started crossing. We should also look out for people approaching the crossing who clearly intend to cross.
Level crossings combine multiple warning systems: flashing red lights, audible warnings, and barrier arms. When these activate, we must stop completely until they clear, even if we can’t see or hear a train approaching.
Preparing for the Theory Test and Practical Application
Mastering the theory test requires combining proper study materials with consistent practice, while staying current with evolving road rules and emerging technologies like self-driving cars. Success comes from understanding both traditional driving principles and modern automotive developments that affect today’s roads.
Study Essentials for Learner Drivers
The foundation of theory test success starts with understanding the Highway Code thoroughly. We recommend treating this as your driving bible rather than just another textbook to memorise.
Essential Study Materials:
- Official Highway Code (latest edition)
- PDF learning materials for offline study
- Practice question banks
- Road sign flashcards
Start by reading one chapter daily instead of cramming everything at once. This approach helps your brain absorb traffic laws, speed limits, and safety guidelines more effectively.
Create a study schedule that covers all major topics:
| Week | Focus Area |
|---|---|
| 1-2 | Road signs and markings |
| 3-4 | Traffic rules and regulations |
| 5-6 | Vulnerable road users |
| 7-8 | Hazard perception |
We’ve found that learners who study consistently for 30 minutes daily perform better than those who study intensively for hours. Your brain needs time to process new information about right-of-way rules, stopping distances, and emergency procedures.
Mock Tests and Resources
Practice tests are your secret weapon for theory test confidence. Free practice Highway Code tests provide realistic exam conditions that mirror the actual test format.
We suggest taking at least three practice tests weekly once you’ve covered the basic material. This frequency helps identify knowledge gaps without overwhelming your study routine.
Top Resources for Mock Tests:
- Official DVSA practice tests
- Comprehensive online platforms with explanations
- Mobile apps for on-the-go practice
- Local library resources
Focus on your weak areas after each mock test. If you struggle with motorway rules, dedicate extra time to those questions. The same applies to hazard perception, which many learners find challenging initially.
Track your progress using a simple scoring system. Aim for consistent scores above 90% before booking your actual theory test. This buffer ensures you’re genuinely ready rather than just scraping by.
Staying Updated With Highway Code Changes
The UK Highway Code evolves regularly to reflect new safety research and changing road conditions. Recent updates have introduced significant changes to priority rules and vulnerable road user protection.
Subscribe to DVSA updates to receive notifications about rule changes. These updates often affect theory test questions within months of implementation.
Recent Important Changes:
- New hierarchy of road users
- Updated mobile phone regulations
- Electric vehicle charging guidelines
- Revised cyclist and pedestrian priorities
We recommend checking for updates monthly during your learning period. Changes might seem minor but can affect your test results if you’re working from outdated information.
Join online learner communities where fellow students discuss recent changes and share insights. These groups often highlight practical applications of new rules that textbooks might miss.
Self-Driving Vehicles: What Learners Should Know
Self-driving technology is reshaping British roads, and modern learners need basic understanding of these systems. While you won’t encounter fully autonomous vehicles in your practical test, assisted driving features are increasingly common.
Key Technologies to Understand:
- Adaptive cruise control
- Lane departure warnings
- Automatic emergency braking
- Parking assistance systems
These systems support safe driving practices but never replace driver responsibility. We emphasise that technology assists rather than replaces good driving judgement and Highway Code knowledge.
Current regulations require drivers to remain alert and ready to take control, even with assistance active. This means understanding both traditional driving skills and how technology integrates with established road rules.
Future theory tests may include questions about interacting with self-driving vehicles on motorways and urban roads. Understanding these interactions now gives you an advantage and prepares you for evolving road conditions throughout your driving career.
Frequently Asked Questions
Mastering roundabout navigation requires understanding priority rules and lane positioning, whilst pedestrian crossings demand awareness of different crossing types and their specific requirements. Traffic signs follow a colour-coded system with distinct meanings, speed limits vary by road type and vehicle category, and adverse weather conditions call for adjusted driving techniques and increased stopping distances.
What vital information should I concentrate on to understand right-of-way at roundabouts?
We always give way to traffic from the right when entering a roundabout. This fundamental rule forms the backbone of safe roundabout navigation.
Position yourself in the correct lane before approaching. The left lane takes you left or straight ahead, whilst the right lane guides you right or straight ahead at most roundabouts.
Signal your intentions clearly. Indicate left when taking the first exit, no signal for straight ahead, and right signal for turning right or going beyond the straight-ahead exit.
Check your mirrors and signal left when passing the exit before your intended one. This tells other drivers you’re leaving the roundabout soon.
Slow down as you approach, but don’t stop unnecessarily if the way is clear. Smooth entry keeps traffic flowing and reduces congestion behind you.
Can you shed light on the essentials of navigating pedestrian crossings confidently?
We must stop completely when the amber light appears at pelican crossings. Never try to beat the red light, as pedestrians may already be crossing.
Zebra crossings require extra vigilance since pedestrians have absolute priority once they step onto the crossing. Look for people waiting at the kerb who might be about to cross.
Puffin and toucan crossings use sensors to detect pedestrians and cyclists. The lights stay red until everyone has safely reached the other side.
Give pedestrians plenty of space and time. Rushing or revving your engine creates unnecessary pressure and danger for vulnerable road users.
Watch for school crossing patrols with their distinctive lollipop signs. All road users must follow their signals, which carry the same legal weight as traffic lights.
Which chapters of the Highway Code can give me a clear insight into the rules surrounding traffic signs and signals?
We find the most comprehensive information about traffic signs in the dedicated signs section of the Highway Code. This covers mandatory signs, warning signs, and information signs with their distinct shapes and colours.
Circular signs give orders you must follow. Red circles typically prohibit actions, whilst blue circles show mandatory requirements like cycle lanes or minimum speeds.
Triangular signs warn of hazards ahead. These include sharp bends, steep hills, school zones, and animal crossing areas that require extra caution.
Rectangular signs provide information about directions, distances, and services. Green signs point to primary routes, whilst brown signs indicate tourist attractions and recreational facilities.
Traffic light sequences follow standard patterns, but some junctions feature filter arrows for turning traffic. Light signals and their meanings are crucial for safe junction navigation.
How can I best familiarise myself with the speed limits and stopping distances relevant to my driving test?
We recommend learning the standard speed limits first: 30mph in built-up areas, 60mph on single carriageways, and 70mph on dual carriageways and motorways. Different vehicle types have lower limits.
Stopping distances increase dramatically with speed. At 30mph, your total stopping distance equals 23 metres (six car lengths), whilst at 70mph it extends to 96 metres (24 car lengths).
Thinking distance depends on your reaction time, typically one second. This equals one foot for every mph of speed, so at 30mph you travel 30 feet before even starting to brake.
Braking distance increases exponentially with speed due to physics. Doubling your speed from 30mph to 60mph multiplies your braking distance by four, not two.
Wet conditions can double your stopping distance, whilst ice makes stopping up to ten times longer. Adjust your speed according to road conditions, not just the posted limit.
Could you guide me through understanding the key aspects of driving in adverse weather conditions?
We need to reduce speed significantly in wet conditions and increase following distances to at least four seconds. Wet roads reduce tyre grip and extend braking distances considerably.
Use dipped headlights during heavy rain, snow, or fog to improve visibility for yourself and other drivers. Full beam headlights actually reduce visibility in fog by reflecting light back.
Test your brakes gently after driving through deep puddles. Water can reduce braking efficiency, so a few light applications help dry the brake pads safely.
In icy conditions, avoid sudden steering movements, harsh braking, or rapid acceleration. Smooth, gentle inputs help maintain traction on slippery surfaces.
Adverse weather driving rules emphasise planning longer journey times and considering whether travel is essential during severe conditions.
Where can I find a comprehensive guide to parking rules and restrictions to ensure I park legally and safely during my driving practice?
We can access detailed parking regulations in the waiting and parking section of the Highway Code. This covers everything from yellow lines to resident parking zones.
Double yellow lines mean no parking at any time, whilst single yellow lines restrict parking during specified hours shown on nearby signs. Always check the accompanying signs for exact times and days.
Red lines indicate even stricter controls where stopping is usually prohibited. These appear mainly in urban areas and around major transport hubs.
Parking at night requires additional considerations. You must park in the direction of traffic flow and use parking lights on roads with speed limits above 30mph.
Blue badge holders have special parking privileges, but these come with specific rules about display and time limits. Understanding these helps you respect disabled parking spaces and avoid inadvertent violations.
Ready to Book Driving Lessons?
LPOD Academy offers intensive driving courses across the UK. Find your nearest location: