Bay Parking Versus Parallel Parking: Differences, Tips & Confidence
Parking can feel like one of the biggest challenges when you’re learning to drive, and honestly, that’s completely normal. We’ve all been there, circling the car park or eyeing up a roadside space whilst our confidence takes a bit of a knock. The good news? Once you understand the key differences between bay parking and parallel parking, you’ll be tackling both with much more confidence.
Bay parking involves reversing or driving forward into marked spaces (typically in car parks), whilst parallel parking requires slotting your car between two vehicles along a kerb. Each technique uses different reference points and requires distinct skills, but both are absolutely manageable once you know what you’re doing. Bay parking generally feels more forgiving because you’ve got wider spaces and clearer boundaries, whereas parallel parking demands more precision in tighter spots.
What makes these skills so worthwhile to master? Well, they’re not just test requirements (though they certainly are that). They’re everyday driving skills that’ll serve you brilliantly whether you’re popping to the shops, heading to work, or navigating busy town centres. We’re going to walk you through everything you need to know about both techniques, including step-by-step guides, practical tips, and the confidence-building strategies that actually work.
Key Takeaways
- Bay parking uses marked spaces and offers more room for error, whilst parallel parking requires fitting between two cars with greater precision
- Both manoeuvres rely on proper observation, reference points, and controlled steering to execute safely and smoothly
- Mastering these essential parking skills builds confidence for your driving test and prepares you for real-world driving situations
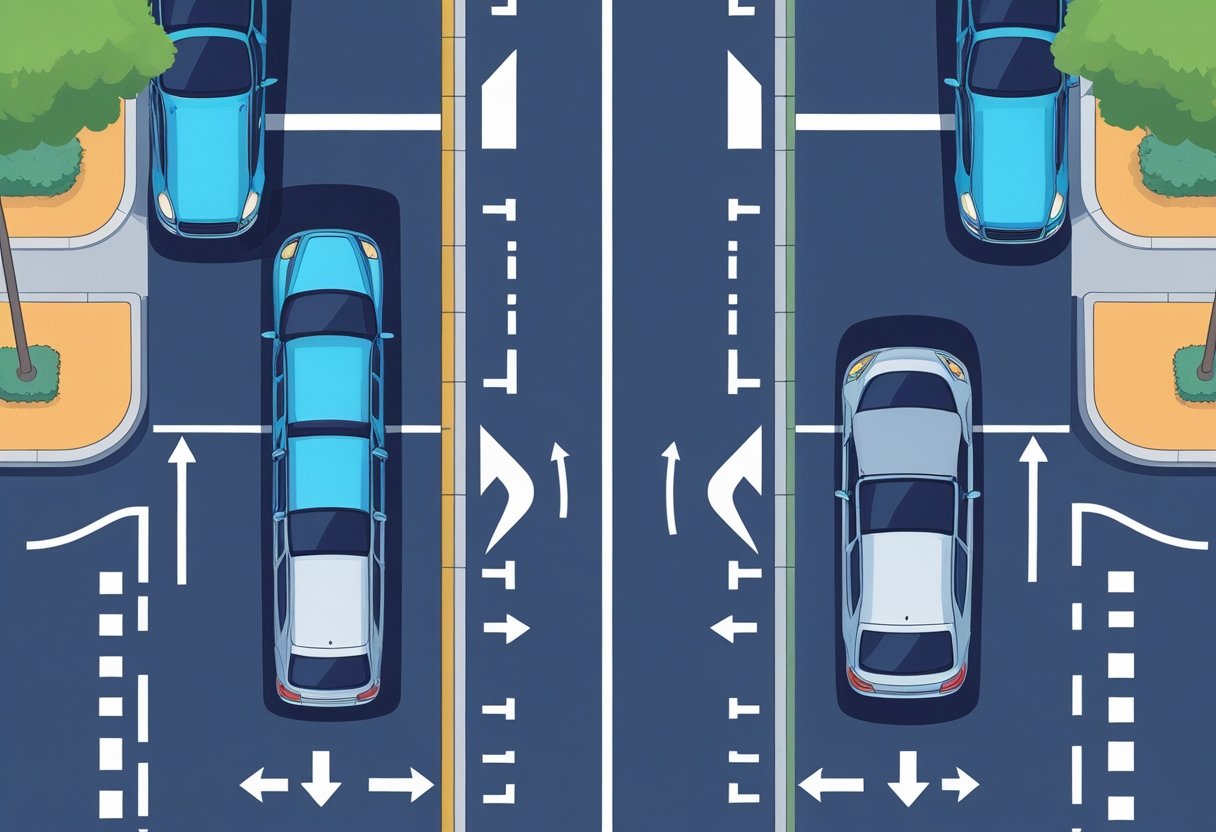
Bay Parking and Parallel Parking: Key Differences Explained
Bay parking involves reversing or driving into marked spaces in car parks, whilst parallel parking means squeezing into a space alongside parked cars on the street. Each technique requires different skills, reference points, and spatial awareness.
What Is Bay Parking?
Bay parking is the art of getting your car into a marked parking bay in a car park. You’ll find these rectangular spaces everywhere, from supermarket car parks to shopping centres.
There are two ways we can tackle bay parking. Forward bay parking means driving straight into the space and reversing out later. Reverse bay parking involves backing into the parking bay and driving out forwards.
Most driving instructors recommend reverse bay parking when possible. It’s actually safer because you get a clearer view when leaving the space. You can see pedestrians and other cars much better when driving out than when reversing into busy car park traffic.
The key to successful bay parking lies in positioning and reference points. We position our car about one car’s width away from the parking bay before starting the manoeuvre. Then we use our door mirrors to spot the white lines of the space.
During your driving test, the examiner might ask you to demonstrate either forward or reverse bay parking. They’ll be looking for smooth control, accurate positioning within the lines, and constant observation for hazards.
What Is Parallel Parking?
Parallel parking means sliding your car into a space between two parked vehicles along a road. It’s probably the manoeuvre that makes most learner drivers break into a cold sweat.
Unlike bay parking, parallel parking always involves reversing into the space. You can’t drive forwards into a parallel parking space because the cars in front and behind block your path.
The technique starts with pulling up alongside the car you’ll be parking behind. We line up our wing mirror with theirs, then reverse slowly whilst turning the steering wheel at specific points.
Reference points are crucial for parallel parking success. Most instructors teach the “door mirror method” where you use your passenger door mirror to judge when to start turning the wheel.
Parallel parking requires excellent spatial awareness. You’re working with much tighter margins than bay parking, often with just centimetres to spare on each end.
The manoeuvre can feel intimidating at first, but it becomes second nature with practice. Many experienced drivers can parallel park without even thinking about the individual steps.
Where You’ll Encounter Each Technique
Bay parking dominates car parks everywhere. You’ll use this skill at:
- Supermarkets and shopping centres
- Workplace car parks
- Hospital and medical centre parking
- Train station car parks
- Residential parking areas
Most bay parking happens in quieter environments with wider spaces and clearer markings.
Parallel parking is essential for street parking in towns and cities. You’ll need this skill for:
- High street shopping areas
- Residential streets without driveways
- Near restaurants and cafes
- Outside friends’ houses
- City centre parking
Parallel parking often happens on busier roads with traffic flowing past. This adds pressure because other drivers might be waiting behind you.
The environments are quite different too. Car parks usually have clear white lines and plenty of space to manoeuvre. Street parking can involve tight spaces, unclear boundaries, and impatient traffic.
Why Learning Both Matters
Your driving test might include either bay parking or parallel parking. The examiner chooses one of three possible reversing manoeuvres, so you can’t predict which one you’ll face.
Both skills prepare you for real-world driving. City drivers use parallel parking daily, whilst bay parking is essential for shopping trips and commuting to work.
Each technique teaches different spatial awareness skills. Bay parking helps you judge distances and angles in controlled environments. Parallel parking develops precision and confidence in tighter spaces.
Learning both manoeuvres also builds overall reversing confidence. The reference points and mirror work transfer between techniques, making you a more skilled driver overall.
Many new drivers avoid certain areas because they can’t park there. Master both techniques, and you’ll have the freedom to drive anywhere with confidence.
Step-by-Step Guide to Forward Bay Parking
Forward bay parking involves driving straight into a marked parking space, which means you’ll need to reverse out afterwards. The key is getting your positioning right from the start and making smooth, controlled movements into the bay.
Positioning Your Vehicle and Sizing Up the Bay
Before we even think about turning into that parking space, we need to make sure it’s actually big enough for our car. A standard parking bay measures about 2.4 metres wide and 4.8 metres long, but some spaces can feel surprisingly tight.
Drive slowly through the car park and have a good look at your chosen bay. Check there’s enough room on both sides and that you won’t be squeezed between two large vehicles when you come to open your doors.
Once you’ve picked your spot, position your car on the opposite side of the roadway from the parking bay. If you’re parking in a bay on the right, stay towards the left side of the car park road. This gives you the widest possible turning circle.
Keep about a car’s width between you and the parked vehicles. This distance is crucial because it gives you room to manoeuvre without feeling cramped or rushed.
Stop when you’re roughly level with the bay you want to park in. Take a moment to check your mirrors and apply the handbrake if you need to compose yourself.
Making the Turn With Precision
Now comes the exciting bit! Signal your intention to turn and check all around for pedestrians, cyclists, and other cars. Car parks can be surprisingly busy places.
Move forward slowly until the right-hand line of your chosen parking bay appears just below your right wing mirror. This is your reference point, and it’s absolutely crucial for getting the angle right.
Turn your steering wheel to full right lock (or full left if you’re parking on the left side). Edge forward very gently, keeping your speed minimal so you can make adjustments if needed.
Watch your positioning carefully as you enter the bay. The secret is to straighten your steering wheel when your dashboard aligns with the horizon line of the parking space. This usually happens when you’re about halfway into the bay.
Don’t rush this part! Other drivers will wait, and it’s much better to take your time than to end up wonky or too close to another vehicle.
Final Adjustments and Safety Checks
Keep moving forward slowly until the kerb or front line of the parking space sits just underneath your right wing mirror. This reference point tells you when to stop without getting too close to any barriers or walls.
Once you’re in position, engage the handbrake and select neutral. Take a quick look around to make sure you’re reasonably straight and have left enough space on both sides for doors to open comfortably.
Check your mirrors one final time to ensure you haven’t blocked any pathways or parking bay entrances. If you’re slightly crooked, don’t worry too much, as long as you’re within the lines and not causing problems for others.
Remember, when you’re ready to leave, you’ll need to reverse out of this parking space. Keep that in mind and make sure you’ve left yourself enough room to manoeuvre safely when the time comes to drive away.
Mastering Reverse Bay Parking: Tips and Techniques
Getting comfortable with reverse bay parking takes practice, but once you nail the setup and understand your reference points, you’ll find car parks much less stressful. The secret lies in proper positioning before you start reversing and knowing exactly when to turn your wheel.
Setting Up for Success: Approach and Alignment
Your approach to the parking bay makes all the difference. We recommend driving slowly past your chosen space and stopping when your car is roughly two car lengths ahead of it.
Position your vehicle parallel to the parking bays. Keep about one metre between your car and the parked vehicles. This gives you enough room to manoeuvre without getting too close to other cars.
Check that the bay you’ve chosen is actually big enough for your vehicle. Look for any trolleys, pillars, or other obstacles that might cause problems once you start reversing.
Key positioning checklist:
- Stop two car lengths past the bay
- Keep one metre gap from parked cars
- Ensure bay is clear of obstacles
- Check for pedestrians before starting
Before you begin reversing, put your car in reverse gear and find your point of turn. This reference point varies slightly between different cars, but it’s usually when the far edge of the parking bay lines up with your passenger door mirror.
Point of Turn and Mirrors: Getting the Angle Right
The point of turn is absolutely crucial for successful reverse bay parking. Most drivers find their point of turn when the corner of the parking bay appears in their passenger side mirror.
Start reversing slowly whilst keeping your steering wheel straight. Watch your passenger mirror carefully. When you spot the far corner of the parking bay in your mirror, that’s your cue to turn the wheel.
Turn the steering wheel fully towards the parking bay. If you’re parking on the left, turn left. For bays on the right, turn right. Keep the wheel at full lock until your car starts entering the bay at the correct angle.
Once your car is roughly halfway into the bay, straighten your steering wheel gradually. Use both wing mirrors to check you’re centred between the white lines.
Mirror technique tips:
- Use passenger mirror for point of turn
- Check both mirrors for positioning
- Look for equal spacing on both sides
- Adjust steering as needed
Your rear-view mirror becomes less useful during reverse bay parking, so rely mainly on your wing mirrors and occasional glances over your shoulder.
Staying Aware of Pedestrians, Cars, and Hazards
Car parks are busy places with lots of movement. Keep scanning for pedestrians, especially children who might dart between vehicles unexpectedly.
Stop immediately if anyone walks behind your car. Make eye contact with pedestrians when possible so they know you’ve seen them. Be extra patient with elderly shoppers or families with young children.
Watch for other cars reversing out of nearby bays. Their drivers might not spot you if they’re focused on their own manoeuvre. Give them space and wait if necessary.
Safety priorities while reverse parking:
- Continuous observation for pedestrians
- Watch for other reversing vehicles
- Stop if unsure about clearances
- Use hazard lights if needed
Check your mirrors frequently but don’t forget to look over your shoulders occasionally. Mirrors have blind spots, and a quick shoulder check can reveal hazards you might miss otherwise.
Once you’re happy with your position, apply the handbrake and put the car in neutral. Take a moment to check you’re properly within the bay lines before switching off the engine.
How to Parallel Park Smoothly Every Time
Mastering parallel parking comes down to getting your reference points right and taking your time with each movement. We’ll show you how to position your car correctly, execute smooth steering movements, and finish with confidence every single time.
Starting Position and Reference Points
Getting your starting position spot on makes everything else fall into place naturally. Pull up alongside the front car until your wing mirrors are roughly aligned.
Keep about an arm’s length distance between your car and the parked vehicle. This gives you enough room to manoeuvre without getting too close.
Check your mirrors before you begin. Make sure there’s no traffic approaching from behind. Signal left to let other drivers know what you’re planning.
Look for a parking space that’s at least one and a half times your car’s length. Don’t attempt to squeeze into tight spots when you’re still learning.
Your reference point is when the rear corner of the front car appears in your passenger door mirror. This tells you it’s time to start reversing.
Apply the handbrake if you’re on a hill or feel more comfortable taking your time. There’s no rush when parallel parking.
Steering and Manoeuvring
Now comes the actual reverse parking part. Put your car in reverse and check all around for pedestrians and cyclists.
Turn your steering wheel full lock to the left as you slowly reverse. Watch your nearside mirror to see your car’s angle changing.
Keep your speed incredibly slow. You want complete control throughout this manoeuvre.
When your car reaches about a 45-degree angle to the kerb, straighten your steering wheel. Continue reversing slowly until your car’s front bumper clears the rear of the front car.
Watch your passenger mirror closely. You’ll see the kerb appearing and can judge how close you’re getting.
If you’re getting too close to the kerb, don’t panic. Stop, pull forward slightly, and try again with less steering angle.
The key is staying calm and making small adjustments rather than big corrections.
Straightening Up and Finishing Like a Pro
Once your front bumper clears the car ahead, it’s time to straighten up. Turn your steering wheel full lock to the right while continuing to reverse slowly.
Keep checking your mirrors and looking over your shoulder. You want to end up parallel to the kerb with equal space front and rear.
When your car is straight, centre your steering wheel and reverse until you’re properly positioned in the space. Leave about 60cm between you and both cars.
Apply your handbrake and put the car in neutral or park. Check you’re not too close to the kerb by looking at your nearside mirror.
If you need to make small adjustments, do it now. Pull forward or reverse slightly to centre yourself perfectly.
Remember, most drivers don’t get parallel parking right first time every time. Take your time, stay patient with yourself, and celebrate when you nail it.
Safety and Observation: Essential Habits for Every Parking Manoeuvre
Good observation skills and safety habits form the backbone of successful parking, whether you’re tucking into a tight parking bay or sliding into a parallel space on a busy street. These fundamental practices keep you, other drivers, and pedestrians safe whilst protecting your car from those frustrating knocks and scrapes.
Checking Surroundings and Blind Spots
We cannot stress enough how crucial it is to check your surroundings before making any parking move. Your mirrors show you most of what’s happening around your car, but they don’t catch everything.
Start with a complete scan. Look in your rear-view mirror, then your wing mirrors, before physically turning to check your blind spots. Do this every time, without exception.
Those blind spots are sneaky devils. They hide cyclists, pedestrians, and even other cars that could suddenly appear just as you’re reversing into a parking space.
Check twice, move once. This simple rule has saved countless drivers from accidents in car parks. After your initial scan, do it again before you start moving.
In busy car parks, people dart between parked cars without warning. Children especially can pop up from nowhere. Keep checking your surroundings throughout the entire manoeuvre, not just at the start.
Physical checks matter most. Turn your head and look directly through your rear window when reversing. Technology helps, but your eyes are still your best tool for spotting potential problems.
Using Mirrors, Cameras, and Parking Aids
Modern cars come packed with helpful technology, but we need to use it wisely. Parking cameras and sensors are brilliant assistants, yet they shouldn’t replace proper observation techniques.
Mirrors are your primary tools. Position them correctly before you start parking. Your rear-view mirror should show the entire back window, whilst your wing mirrors should just catch the edge of your car.
Many newer vehicles have rear-view cameras that activate when you select reverse gear. These cameras show you what’s directly behind your car, which is particularly useful in tight parking bays.
Parking sensors beep faster as you get closer to obstacles. They’re especially handy for judging distances in cramped car parks. However, they don’t always detect small objects or people.
Some cars have 360-degree cameras that show a bird’s-eye view of your vehicle. This technology is fantastic for seeing the whole picture when manoeuvring into tricky spaces.
Remember to clean your cameras and sensors regularly. Mud, snow, or even a thick layer of dust can make them less effective when you need them most.
Trust your instincts alongside technology. If something feels wrong, stop and check manually, even if your parking aids suggest everything’s clear.
Looking Out for Pedestrians and Cyclists
Car parks and street parking areas buzz with activity. Pedestrians weave between vehicles, cyclists filter through traffic, and children dart about unpredictably.
Pedestrians don’t always behave logically. They might walk behind your car just as you’re reversing, or step out from between parked vehicles. This is why we always move slowly and keep watching.
In supermarket car parks, shoppers often push trolleys that extend beyond their bodies. These can scratch your car or cause accidents if you’re not paying attention.
Cyclists present unique challenges. They’re quieter than cars and can appear quickly in your mirrors. On busy streets, cyclists often filter down the left side of traffic, right where you might be parking.
Children are the wildcard. They’re small, quick, and don’t always understand the dangers around cars. In residential areas or family-friendly car parks, extra vigilance is essential.
Move at a snail’s pace when pedestrians are nearby. This gives everyone time to see you and react appropriately. Apply your handbrake if you need to wait for people to pass.
Use your indicators to show your intentions clearly. This helps pedestrians and cyclists understand what you’re planning to do, giving them chance to stay safely out of your way.
Parking Manoeuvres in the Practical Test
During your practical test, you’ll face one of three possible parking manoeuvres. The examiner evaluates your control, accuracy, and safety awareness throughout the entire process.
What Examiners Look For
Control and smoothness matter most during parking manoeuvres. We need to show steady progress without jerky movements or sudden stops.
Your examiner watches how you handle the handbrake. Apply it each time you stop to check mirrors or assess your position. This demonstrates good control habits.
Mirror checks should happen regularly throughout the manoeuvre. Look around for pedestrians, cyclists, and other vehicles before you start and during the parking process.
For reverse bay parking, examiners want to see you reverse into the space accurately. Keep the car straight and centred between the lines.
With forward bay parking, they check how well you drive into the space initially. Then they watch your reversing technique when leaving.
Parallel parking requires precise positioning alongside the kerb. Stay close but avoid mounting it.
Your observations need to be thorough and obvious. Turn your head to show you’re actively checking blind spots.
Common Mistakes and How to Avoid Them
Forgetting the handbrake costs many learners their test. Apply it every time you stop, even for quick position checks.
Poor positioning happens when we rush the setup. Take time to align your car properly before starting the manoeuvre.
Many learners reverse too quickly during bay parking or parallel parking. Slow speeds give you better control and more time to make adjustments.
Inadequate observations often result in test failure. Check mirrors and look around continuously, not just at the beginning.
Hitting the kerb during parallel parking is avoidable. If you’re getting too close, stop and readjust your angle.
Crossing the lines in bay parking shows poor spatial awareness. Use your reference points and don’t be afraid to make corrections.
We recommend practising each manoeuvre until it becomes second nature. Confidence comes from repetition and understanding your car’s dimensions.
Frequently Asked Questions
Learning to park can feel overwhelming, but these common questions help clarify the key techniques and mindset you need. From mastering reference points to staying relaxed during your test, we’ve got the answers to boost your confidence behind the wheel.
What are the key manoeuvres to master for a successful bay parking?
The foundation of bay parking lies in controlling your speed and steering with precision. We recommend practising both forward and reverse bay parking until you feel comfortable with either technique.
Reference points are your best friends here. For reverse bay parking, learn to spot when the bay lines appear in your wing mirrors. This tells you exactly when to straighten your steering wheel.
Positioning matters enormously before you even start the manoeuvre. Pull up about a car’s width away from the parking bay, giving yourself plenty of room to turn. Stop roughly two car lengths past your chosen space.
Mirror checks and observations should become second nature throughout the entire process. Your examiner will notice if you forget to check your blind spots, so make it part of your routine.
How can I ensure my vehicle is positioned correctly while parallel parking?
Start by finding a parking space that’s at least one and a half times the length of your car. This gives you enough room to manoeuvre without stress.
Pull up alongside the front car until your wing mirrors align. This creates the perfect starting position for your reversing manoeuvre. Keep about an arm’s length distance between the two vehicles.
Begin reversing slowly whilst steering full lock towards the kerb. When you can see the rear car’s headlights in your wing mirror, straighten the wheel and continue backing up.
Don’t panic if you’re not perfectly positioned on your first attempt. Most drivers need to adjust their position by moving forward and backward slightly.
Could you offer some advice to stay calm during manoeuvres in a driving test?
Take your time and remember that your examiner wants you to succeed. They’re not trying to catch you out, they’re assessing whether you can park safely and confidently.
Breathing steadily helps keep your nerves in check. If you feel flustered, pause for a moment before continuing. Your examiner won’t penalise you for taking a breath.
Remember that small adjustments are perfectly acceptable during your test. If you notice you’re heading towards a line, it’s better to stop and readjust than to continue and make things worse.
Focus on the manoeuvre itself rather than worrying about the outcome. Trust the techniques you’ve practised and let your muscle memory guide you through each step.
What are the essential safety checks to perform before attempting bay or parallel parking?
Always check your mirrors and blind spots before starting any parking manoeuvre. This includes your interior mirror, both wing mirrors, and a quick glance over your shoulder.
Look out for pedestrians, especially in busy car parks where people might be walking between vehicles. Children can be particularly difficult to spot, so extra caution pays off.
Check for oncoming traffic if you’re parking on a street. Put your indicator on early to signal your intentions to other drivers approaching from behind.
Make sure you can see the parking bay lines clearly before committing to a space. If visibility is poor due to poorly marked lines or obstacles, choose a different bay.
Why is choosing the correct parking technique important in different driving scenarios?
Reverse bay parking works brilliantly in car parks because you get a clear view when driving out. This makes it much safer when leaving busy shopping centres or supermarkets.
Forward bay parking might be necessary when there’s limited space behind you or when car park layouts make reversing difficult. Some car parks have one-way systems that determine your approach.
Parallel parking becomes essential on busy streets where bay parking simply isn’t available. Urban driving often requires this skill for visiting shops, restaurants, or residential areas.
Consider the traffic flow and other drivers around you. Sometimes one technique creates less disruption than another, making everyone’s journey smoother and safer.
Are there any foolproof methods for judging distances when parking between cars?
Your wing mirrors become excellent distance gauges once you learn to read them properly. When bay parking, the lines appearing evenly in both mirrors means you’re centred perfectly.
For parallel parking, use the other cars as reference points. When you can see the full rear car in your mirror, you’re usually far enough back to start straightening up.
Practice with cones or markers in a quiet car park helps you calibrate your spatial awareness. This builds confidence before attempting parking in tighter spaces with real vehicles.
Remember that modern cars often have different dimensions, so don’t rely solely on comparing your car to others. Trust your mirrors and the reference points you’ve learned during lessons.