Difference Between Multiple‑Choice and Hazard‑Perception Sections: A Complete Guide for Learner Drivers
When you’re preparing for your driving theory test, understanding the two distinct sections can make all the difference in your success. The theory test isn’t just one exam but rather two separate assessments that work together to evaluate your readiness for the road.
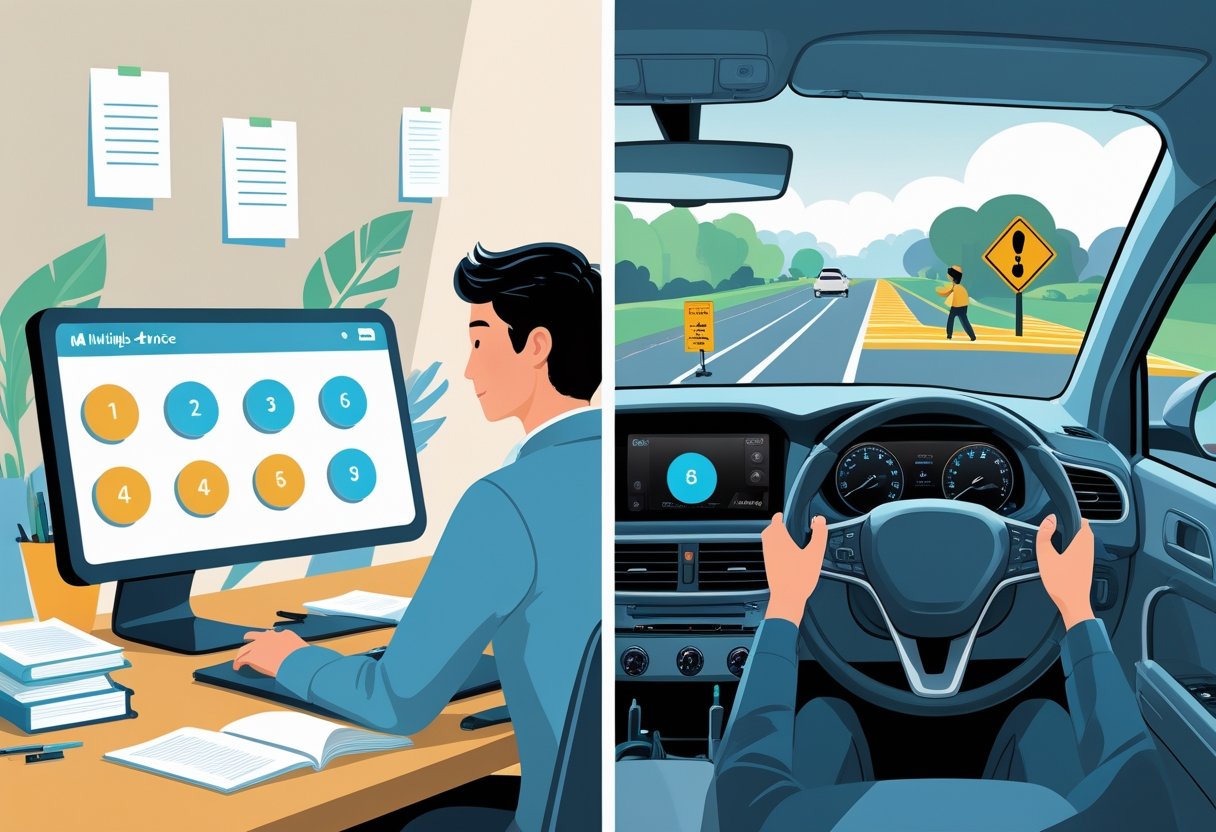
The multiple-choice section tests your knowledge of traffic rules and road signs through 50 questions, whilst the hazard-perception section evaluates your ability to spot developing dangers through video clips. These sections require completely different skills and preparation strategies, which is why many learners find one significantly more challenging than the other.
We’ll walk you through exactly what makes each section unique, from the specific skills they’re testing to the marking systems they use. You’ll discover practical examples of what to expect, proven revision techniques that actually work, and insider tips that can boost your confidence on test day. Whether you’re worried about memorising traffic signs or concerned about clicking at the right moment during those tricky video scenarios, we’ve got the guidance you need to tackle both sections with confidence.
What Is the Difference Between the Multiple-Choice and Hazard-Perception Sections?

The multiple-choice section tests your knowledge of road rules through written questions, whilst the hazard perception section evaluates your ability to spot dangerous situations in real-time video clips. Each section serves distinct purposes and requires different preparation strategies.
Purpose and Goals of Each Section
The multiple-choice section focuses on your theoretical understanding of driving rules and regulations. We’re talking about speed limits, stopping distances, road signs, and traffic laws that keep everyone safe on Britain’s roads.
This part of the driving theory test measures whether you’ve absorbed the essential knowledge from the Highway Code. You’ll face questions about vehicle safety checks, vulnerable road users, and legal requirements.
The hazard perception section serves a completely different purpose. It tests your ability to recognise developing dangers before they become serious problems.
Unlike the multiple-choice section, the hazard perception test has no right or wrong answers. Instead, it measures how quickly you spot potential hazards in realistic driving scenarios.
This section prepares you for split-second decisions you’ll make during your practical driving test and beyond.
How Each Section Is Structured
The multiple-choice portion presents 50 questions on a computer screen. You’ll have 57 minutes to complete them all, giving you plenty of time to think through each answer carefully.
Questions appear one at a time with multiple answer options. You can flag tricky questions and return to them later if needed.
The hazard perception section works differently. You’ll watch 14 video clips featuring everyday road scenes, and each clip contains at least one developing hazard.
One special clip includes two developing hazards instead of just one. You can take up to a three-minute break between the multiple-choice and hazard perception sections.
Key differences in structure:
- Multiple-choice: 50 questions, 57 minutes, text-based
- Hazard perception: 14 video clips, timed responses, visual-based
Key Skills Assessed
The multiple-choice section evaluates your memorisation and understanding of driving theory. You’ll demonstrate knowledge of road markings, legal requirements, and safety procedures.
Critical thinking plays a role too. Some questions require you to apply rules to specific situations rather than simply recalling facts.
The hazard perception test ensures learners can spot developing hazards, which is crucial for road safety. This section tests your visual awareness and reaction timing.
A developing hazard is something that would cause you to take action, like changing speed or direction. For example, a parked car becomes a hazard when its indicator starts flashing and it begins moving.
Skills tested in each section:
- Multiple-choice: Memory, rule comprehension, situational judgement
- Hazard perception: Visual scanning, timing, risk assessment
Link Between Both Sections in the Theory Test
Both sections work together to create well-rounded drivers. The multiple-choice section gives you the knowledge foundation, whilst hazard perception develops your practical observation skills.
You must pass both parts to pass your theory test. Failing either section requires retaking the entire test.
This connection makes sense when you think about real driving. You need to know the rules and spot dangers simultaneously on busy roads.
Success in both sections shows you’re ready for your practical driving test. The knowledge from multiple-choice questions helps you understand why certain hazards matter, whilst hazard perception skills keep you alert behind the wheel.
Taking practice tests for both sections builds confidence and familiarity with the testing format before your official theory test appointment.
The Multiple-Choice Section Explained
The multiple-choice section forms the first part of your theory test and consists of 50 questions covering essential driving knowledge. You’ll need to score at least 43 out of 50 to pass, and the questions draw from official DVSA materials including the Highway Code.
Format of the Multiple-Choice Questions
The multiple-choice section consists of 50 questions that you’ll complete on a computer at an official DVSA test centre. Each question typically presents four possible answers, with only one correct option.
You’ll have 57 minutes total for both parts of the theory test. This gives you plenty of time to read each question carefully and consider your options.
The questions appear one at a time on screen. You can move backwards and forwards through the test, which means you can return to questions you’re unsure about.
Question Types Include:
- Single correct answer (most common)
- Multiple correct answers from a list
- True or false statements
- Image-based questions with road signs or scenarios
Some questions include helpful diagrams or photographs. These visual elements often show road layouts, traffic signs, or driving situations that require your interpretation.
You can flag questions for review if you’re uncertain. This feature helps you manage your time effectively and ensures you don’t miss any tricky questions.
Topics Covered in the Questions
The official DVSA questions cover nine main categories that reflect real-world driving knowledge. These topics come directly from the DVSA handbook and Highway Code, ensuring you’re tested on current driving standards.
Core Subject Areas:
- Alertness (including observation and anticipation)
- Attitude (consideration for other road users)
- Safety and your vehicle (maintenance and safety checks)
- Safety margins (stopping distances and following gaps)
- Hazard awareness (identifying potential dangers)
- Vulnerable road users (pedestrians, cyclists, motorcyclists)
- Other types of vehicle (lorries, buses, emergency vehicles)
- Vehicle handling (steering, braking, acceleration)
- Motorway rules (joining, leaving, lane discipline)
Questions often test practical scenarios you’ll encounter as a new driver. Rather than asking you to memorise random facts, they focus on situations where good judgement keeps everyone safe.
Environmental impact and fuel efficiency feature regularly too. You might see questions about eco-friendly driving techniques or how vehicle maintenance affects emissions.
How to Approach the Official DVSA Questions
We recommend starting your revision with the Highway Code as your foundation text. This official publication contains the rules and guidance that form the basis of most theory test questions.
Supplement your Highway Code study with quality theory test revision resources. The AA theory test book offers excellent practice questions and explanations that mirror the official test format.
Effective Study Strategies:
- Read thoroughly before attempting practice tests
- Take regular mock tests to identify weak areas
- Review incorrect answers and understand why you got them wrong
- Focus extra attention on topics you find challenging
Theory test revision works best when you combine reading with active practice. Don’t just memorise answers; instead, understand the reasoning behind each correct response.
Many learners find it helpful to study little and often rather than cramming. Twenty minutes of daily revision over several weeks proves more effective than marathon study sessions.
Keep track of your practice test scores. Once you’re consistently scoring 45+ out of 50 on mock tests, you’ll feel confident about booking your real test.
Consider downloading the official DVSA theory test app. This gives you access to all the official questions and helps you get familiar with the computer-based format you’ll encounter on test day.
Understanding the Hazard-Perception Section
The hazard perception section tests your ability to identify real dangers on the road through 14 video clips of everyday driving situations. You’ll need to spot developing hazards quickly and click at the right moment to score points.
Format of the Hazard-Perception Clips
The hazard perception test consists of 14 video clips, each lasting about one minute. These clips show real road scenes filmed from a driver’s perspective.
Each clip contains at least one developing hazard. However, one clip will have two developing hazards, so stay alert throughout every video.
The clips feature normal driving situations you’ll encounter on actual roads. Think busy high streets, country lanes, and residential areas with pedestrians, cyclists, and other vehicles.
Key details about the format:
- 14 clips total
- Approximately 1 minute each
- Real-world driving scenarios
- Filmed from driver’s viewpoint
- One clip has 2 hazards instead of 1
You watch each clip once only. There’s no pause button, rewind, or second chances once you’ve seen it.
What Counts as a Hazard
A hazard is something that would cause you to take action, like changing speed or direction. We’re talking about situations where you’d genuinely need to respond as a driver.
Static objects don’t count as hazards. A parked car sitting quietly at the roadside won’t score you points, even if it looks potentially problematic.
The hazard becomes “developing” when it starts to create a situation requiring your response. That same parked car becomes a developing hazard when its indicator starts flashing and it begins pulling out.
Examples of developing hazards:
- Pedestrians stepping into the road
- Vehicles changing lanes unexpectedly
- Children playing near the carriageway
- Cars emerging from side roads
- Cyclists wobbling or turning
Think about real driving situations. If you’d naturally slow down, change lanes, or adjust your position, that’s likely a developing hazard worth clicking on.
Developing Hazards vs Potential Hazards
Understanding the difference between developing and potential hazards is crucial for scoring well. Potential hazards are things that might become dangerous but haven’t started moving or changing yet.
A potential hazard might be children playing on the pavement near the road. They’re worth watching, but they’re not actively creating danger yet. Clicking too early won’t score points.
A developing hazard is when those same children start moving towards the road or a ball bounces into your path. Now they’re actively creating a situation you’d respond to.
The key difference:
- Potential: Could become dangerous (but isn’t yet)
- Developing: Actually becoming dangerous (action needed)
You can score up to 5 points for each developing hazard. Click as soon as you see the hazard starting to develop to get the highest score.
Don’t click randomly or in patterns, as this won’t score any points. Trust your driving instincts and click when you genuinely spot something developing.
Examples of Common Hazards You’ll See
The hazard perception clips feature real driving situations where you’ll need to spot potential hazards as they develop. You’ll encounter everyday road scenes involving pedestrians stepping into roads, cyclists changing direction, and vehicles pulling out unexpectedly.
Recognising Pedestrians and Cyclists
Pedestrians are among the most common hazards you’ll spot during the test. Watch for people walking near the kerb who might step into the road without warning.
Children playing near parked cars often become potential hazards when they dart between vehicles. Elderly pedestrians crossing slowly can also create developing situations.
Cyclists present unique challenges because they can change direction quickly. Look for cyclists checking over their shoulders before turning or moving around obstacles.
A cyclist wobbling or riding close to parked cars might suddenly swerve into your path. This becomes a potential hazard the moment you notice the unstable movement.
We often see clips where cyclists signal to turn right at junctions. The hazard develops when they begin positioning themselves in the road centre.
Dealing With Heavy Vehicles and Parked Cars
Heavy vehicles like lorries and buses create hazards through their size and limited visibility. Watch for trucks pulling out of side roads where the driver might not see smaller vehicles.
Buses pulling away from stops are classic hazards. The situation develops when passengers finish boarding and the bus indicates to move off.
Parked cars might seem harmless, but they hide developing hazards. Look for:
- Car doors opening suddenly
- Vehicles with running engines
- Indicators starting to flash
- Slight forward movement
A parked car becomes a developing hazard when its indicator starts flashing and it begins moving into traffic. You’d need to slow down or change lanes.
Identifying Roadworks and Unusual Situations
Roadworks create multiple hazard opportunities in test clips. Traffic lights controlling single-lane sections often feature, especially when lights change from green to amber.
Construction vehicles entering or leaving work sites present developing hazards. Watch for machinery moving slowly or workers stepping into the carriageway.
Temporary traffic management creates bottlenecks where vehicles merge unexpectedly. Lane closures force cars to change direction, making these prime hazard locations.
Weather conditions add complexity to hazards. Rain makes road surfaces slippery, whilst snow reduces visibility and increases stopping distances.
Animals near rural roads, emergency vehicles approaching from behind, and broken-down cars with hazard lights all appear regularly in test scenarios.
Marking, Pass Marks, and Scoring
The multiple-choice section requires 43 correct answers out of 50, whilst the hazard perception test needs 44 points out of 75. Both sections use different marking systems, and understanding these differences helps you prepare effectively.
How Each Section Is Marked
The multiple-choice questions follow straightforward marking. Each question receives one point for a correct answer and zero for incorrect ones.
We calculate your score automatically through the computer system. There’s no partial credit or negative marking to worry about.
The hazard perception test works differently. You earn points based on how quickly you spot developing hazards in video clips.
Early clicks earn maximum points:
- Click immediately when hazards develop: 5 points
- Slightly delayed responses: 4-3 points
- Late clicks: 2-1 points
- Miss the hazard completely: 0 points
Each hazard perception clip contains one scoring hazard, except one clip that has two. This gives you 15 scoring opportunities across 14 clips.
Random clicking gets penalised. The system detects clicking patterns and awards zero points for that clip if it suspects you’re guessing.
Pass Marks and How to Achieve Them
You must pass both sections to receive your theory test certificate. Failing either part means retaking the entire test.
Required pass marks:
- Multiple-choice: 43 out of 50 (86%)
- Hazard perception: 44 out of 75 (59%)
The multiple-choice pass mark allows only seven wrong answers. We recommend thorough study using the official DVSA handbook and practice tests.
For hazard perception, you need consistent spotting across most clips. Missing several hazards makes passing difficult, even if you score maximum points on others.
Practice with hazard perception mock tests builds your scanning technique. Real clips move at normal speed, so developing quick recognition skills proves essential.
Impact of Clicking and Timing in Hazard Perception
Your clicking timing directly affects your score in ways that surprise many learners. The computer measures the exact moment you click against when hazards start developing.
Perfect timing means:
- Watching constantly without random clicks
- Clicking once when you spot genuine hazards
- Avoiding multiple rapid clicks on the same hazard
Early clicks during the hazard’s development phase score highest. Late reactions still earn points, but fewer than prompt responses.
The system punishes excessive clicking severely. If you click too frequently or in obvious patterns, that entire clip scores zero points.
We suggest watching each scenario unfold naturally. Trust your instincts when something looks dangerous, then click once confidently.
Some clips contain no scoring hazards despite showing traffic situations. These test clips don’t affect your final score but help calibrate the system.
Top Strategies and Revision Tips for Both Sections
Success in both the multiple-choice and hazard perception sections requires dedicated preparation using the right resources and practice methods. Building strong hazard perception skills takes time and patience, whilst mock tests help create the confidence you need for exam day.
Best Study Resources and Books
The Highway Code remains your essential starting point for theory test revision. This official guide covers all the rules you’ll encounter in multiple-choice questions.
Top revision resources include:
- DVSA’s official theory test app
- AA and RAC theory test apps
- Driving Theory Test Made Easy by AA Publishing
- Online practice platforms like PassMeFast
Physical books work brilliantly for focused study sessions. Many learners find they retain information better when reading from printed materials rather than screens.
Choose resources that offer explanations alongside answers. Simply memorising facts won’t help you understand the reasoning behind road rules. Multiple choice questions often test your ability to remember information, so thorough revision becomes vital.
Mix different resource types to keep your learning fresh. Apps work perfectly for quick revision during commutes, whilst books suit longer study periods at home.
Advice for Building Hazard Perception Skills
Developing strong hazard perception skills requires regular practice watching real driving scenarios. Start by understanding what constitutes a developing hazard versus a potential one.
Key hazard perception advice:
- Click when hazards begin developing, not when they appear
- Watch for pedestrians, cyclists, and other vehicles
- Look for weather conditions affecting visibility
- Notice road signs and markings that signal changes
Practice daily for short periods rather than cramming. Twenty minutes of focused hazard perception practice beats two hours of rushed clicking.
Study different environments systematically. Urban areas present different challenges compared to rural roads or motorways. Each setting requires adjusted awareness levels.
Watch the clips without clicking first. This helps you identify patterns and understand how hazards typically develop. Then replay whilst practising your timing.
Your hazard perception skills improve through consistent exposure to varied scenarios. Real-world observation whilst being driven also sharpens these abilities.
Using Mock Tests to Build Confidence
Mock tests replicate actual exam conditions and highlight knowledge gaps before your real test. Take practice exams regularly throughout your revision period.
Effective mock test strategies:
- Time yourself strictly (57 minutes for multiple-choice)
- Complete tests in quiet environments
- Review incorrect answers thoroughly
- Track your progress over multiple attempts
Never leave multiple choice questions unanswered during practice. This builds good exam habits and sometimes lucky guesses earn marks.
For hazard perception mock tests, focus on timing rather than clicking frantically. Smooth, considered responses typically score better than rushed reactions.
Create a realistic test schedule. Aim for one full mock test weekly, with shorter topic-specific quizzes filling gaps between sessions.
Use mock test results to guide your revision priorities. Spending extra time on weaker areas maximises your preparation efficiency before the actual exam.
Frequently Asked Questions
The multiple-choice section tests your knowledge of road rules and theory, whilst the hazard perception part evaluates your ability to spot developing dangers in real-time video scenarios. Each section requires different skills and preparation methods to achieve the passing scores of 43 out of 50 and 44 out of 75 respectively.
How do the methods of assessment differ between the multiple-choice and hazard-perception parts of the test?
The multiple-choice section presents you with written questions and four possible answers to choose from. You’ll work through 50 questions in 57 minutes at your own pace.
You can navigate between questions freely and flag ones you’d like to revisit later. This flexibility lets you tackle easier questions first and return to challenging ones.
The hazard perception test works completely differently. You’ll watch 14 video clips featuring everyday road scenes and click your mouse when you spot developing hazards.
Each clip plays only once, and you cannot pause or rewind them. There’s no going back to change your responses once a clip finishes.
You can take a break of up to three minutes between the two sections to reset your focus.
What skills are primarily examined in each section of the driving theory test?
The multiple-choice questions test your understanding of traffic laws, road signs, and driving procedures. You’ll encounter questions about stopping distances, speed limits, and what different road markings mean.
Vehicle safety checks, environmental driving techniques, and rules for different road users also feature prominently. This section measures how well you’ve memorised the theoretical knowledge needed for safe driving.
The hazard perception test evaluates your observational skills and reaction timing. We’re looking at whether you can identify potential dangers as they begin to develop, not after they’ve already happened.
Your ability to process visual information quickly whilst maintaining concentration becomes crucial. This section mirrors the split-second decisions you’ll make as a real driver on busy roads.
Could you walk me through the process of how the hazard perception section is scored?
You can score up to 5 points for each developing hazard you identify correctly. The key lies in clicking your mouse as soon as the hazard starts to develop, not when it becomes obvious.
Thirteen clips contain one developing hazard each, whilst one special clip features two hazards. This gives you 15 hazards to spot across all 14 video clips.
Early identification earns maximum points, whilst later clicks receive fewer points. If you spot the hazard too late or miss it entirely, you’ll score zero for that particular hazard.
The system penalises continuous clicking or rhythmic patterns by awarding no points for that clip. However, incorrect single clicks don’t reduce your score, so don’t worry about occasional mistakes.
In what way does preparation for the hazard perception test contrast with studying for the multiple-choice questions?
Multiple-choice preparation involves reading the Highway Code, learning traffic signs, and memorising facts about driving laws. Traditional study methods like flashcards and practice tests work brilliantly for this section.
You can research answers, discuss tricky questions with others, and build your knowledge systematically over time. Books, apps, and online resources provide comprehensive coverage of the theoretical material.
Hazard perception preparation requires hands-on practice with video-based simulations. Online tools and apps that simulate the hazard perception test help improve your response times and accuracy.
Real-world observation skills matter enormously here. Practising as a passenger, watching how experienced drivers react to developing situations, and understanding what constitutes a genuine hazard all contribute to success.
The timing element means you need to train your reflexes, not just your knowledge.
Can you shed some light on the types of hazards one should expect in the video clips during the hazard perception test?
A developing hazard is something that would cause you to take action, like changing speed or direction. Static objects like parked cars or pedestrians standing on pavements don’t count as hazards.
Common hazards include cars pulling out from side roads, pedestrians stepping into the road, and cyclists changing direction unexpectedly. Animals, emergency vehicles, and weather-related dangers also appear in the clips.
The crucial moment occurs when a static situation becomes dynamic. For example, a parked car becomes a hazard only when its indicator starts flashing and it begins moving into traffic.
Children playing near roads, vehicles ahead braking suddenly, and motorcyclists filtering between lanes represent typical scenarios you’ll encounter. Each situation requires you to identify the exact moment when potential danger becomes actual danger.
What advice would you offer to effectively transition from practicing for the multiple-choice to preparing for the hazard perception section?
Start hazard perception practice only after you’re confident with multiple-choice questions. Trying to master both simultaneously can feel overwhelming and reduce your effectiveness in each area.
Dedicate separate study sessions to each section rather than mixing them together. Your brain needs time to switch between analytical thinking and visual processing modes.
Begin hazard perception training with slower practice clips if available, then gradually work up to full-speed scenarios. This builds your confidence and helps you understand what constitutes a developing hazard.
Focus on understanding the principles behind hazard recognition rather than memorising specific scenarios. Real driving situations vary enormously, so flexibility in your thinking serves you better than rigid expectations.
Practice regularly but in shorter sessions to maintain concentration levels. Twenty-minute focused sessions often prove more valuable than hour-long marathons where your attention starts to wander.