Tips for Practising Manoeuvres Outside of Lessons: Boost Skills & Pass Your Test
Learning to drive can feel overwhelming, especially when it comes to mastering those tricky manoeuvres that make even confident learners break out in a sweat. Whether you’re wrestling with parallel parking or trying to nail that perfect three-point turn, we know how frustrating it can be when lesson time runs out just as you’re getting the hang of things.
The good news is that you don’t have to wait until your next lesson to improve. Practising manoeuvres outside of lessons with a qualified supervisor can dramatically boost your confidence and skill level, giving you the extra time you need to perfect these essential driving techniques. With the right approach, a suitable practice location, and proper insurance in place, you can transform those nerve-wracking manoeuvres into second nature.
We’ve put together practical strategies to help you make the most of your private practice sessions. From finding the perfect car park to understanding what makes each manoeuvre tick, you’ll discover how to turn every practice session into a confidence-building opportunity that brings you closer to test success.
Key Takeaways
- Regular practice outside lessons helps build muscle memory and reduces anxiety around challenging manoeuvres
- Safe practice requires proper supervision, valid insurance, and choosing appropriate locations away from busy traffic
- Focusing on reference points and consistent technique during private practice sessions leads to better test performance
Why Private Practice Matters for Manoeuvres
Private practice transforms your manoeuvre skills by giving you extra time to master tricky movements, develop genuine confidence through repetition, and experience driving situations beyond the controlled environment of formal lessons.
Bridging the Gap Between Lessons
Learning to drive can feel like a stop-start process when you only practise once a week. We’ve all experienced that frustrating moment when a manoeuvre felt perfect in your last lesson, but now you’re struggling to remember the exact reference points.
Regular practice between lessons helps maintain momentum. Your muscle memory stays fresh when you don’t have long gaps between attempts. This consistency makes each driving lesson more productive.
Most learner drivers find certain manoeuvres more challenging than others. Bay parking might click immediately, whilst parallel parking feels impossible. Private practice lets you focus extra time on your weak spots without eating into lesson time.
Key benefits of regular practice:
- Maintains muscle memory between lessons
- Allows focused work on problem areas
- Reduces the need to re-learn movements each lesson
- Creates smoother progression towards test readiness
The practical driving test requires smooth, confident execution of manoeuvres. We can’t achieve this level of skill with limited practice time during formal lessons alone.
Building Confidence and Control
Confidence comes from repetition, and manoeuvres need lots of it. When we practise the same movement multiple times in a relaxed environment, our anxiety naturally decreases. This reduction in stress helps us perform better when it really counts.
Private practice removes the pressure of lesson time constraints. You can take as long as needed to get comfortable with each step. There’s no worry about wasting expensive lesson time if you need several attempts to get it right.
Many learner drivers feel nervous about manoeuvres because they seem complex. Breaking them down into smaller steps during private practice makes them feel manageable. You start to understand the logic behind each movement.
Confidence-building strategies:
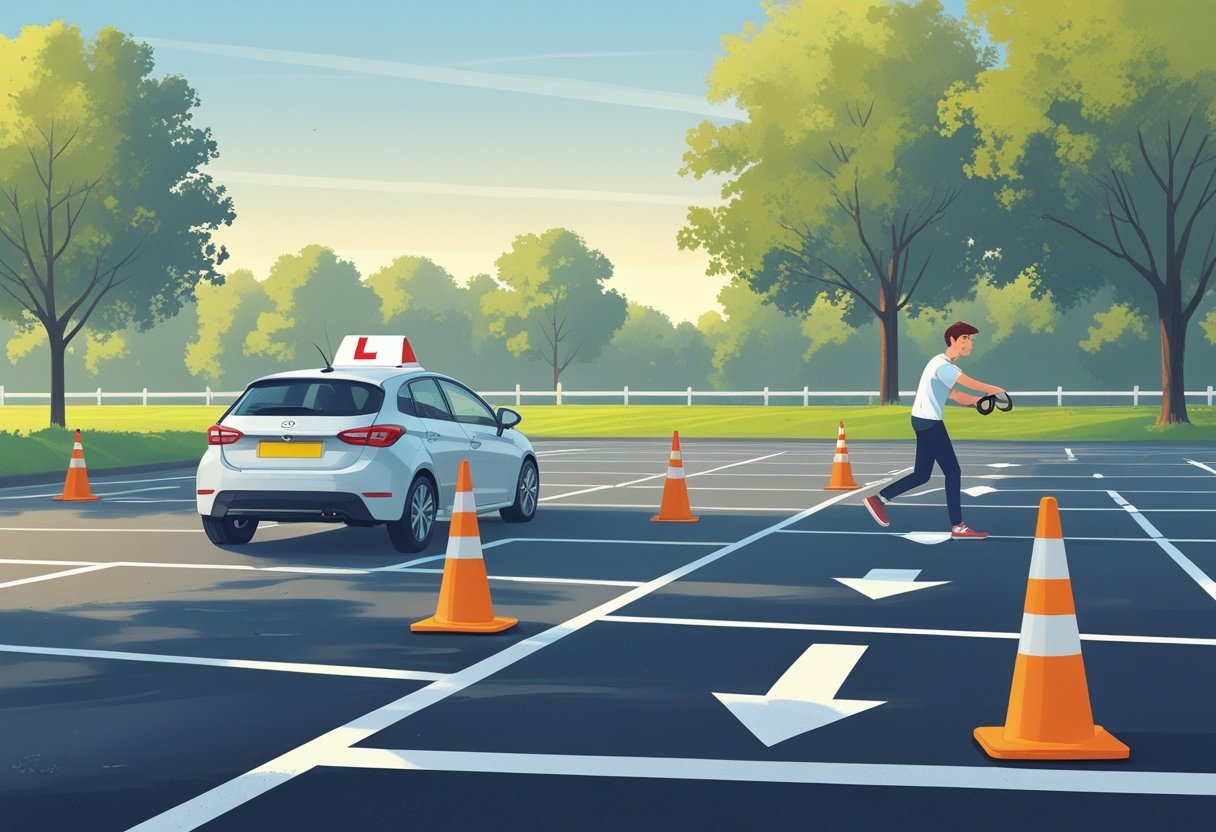
- Start in quiet car parks with plenty of space
- Practise the same manoeuvre multiple times in one session
- Gradually increase difficulty as comfort grows
- Focus on smooth steering rather than speed
Real confidence develops when you’ve successfully completed a manoeuvre many times. This experience carries over into your driving test, where nerves often affect performance.
Learning from Real-World Driving
Driving lessons usually happen in familiar locations with predictable conditions. Private practice exposes you to different car parks, varying space sizes, and real parking challenges you’ll face after passing your test.
Every car park has unique characteristics. Some have tight spaces, others have unusual layouts or poor lighting. Practising in various locations teaches you to adapt your technique rather than simply memorising one routine.
We learn valuable problem-solving skills when practising manoeuvres in different settings. You might discover that your usual reference points don’t work in a sloped car park, forcing you to develop backup strategies.
Real-world practice benefits:
- Experience with different space sizes and layouts
- Adaptation to various ground surfaces and slopes
- Practice with other cars and obstacles present
- Development of spatial awareness in unfamiliar settings
This varied experience makes you a more versatile driver. When you encounter tricky parking situations after passing your practical driving test, you’ll have the skills and confidence to handle them successfully.
Core Manoeuvres to Master Outside Lessons
These four essential driving manoeuvres form the backbone of your practical test, and each one needs dedicated practice time. Mastering parallel parking, bay parking, reversing around corners, and three-point turns requires patience, repetition, and the right techniques.
Parallel Parking Essentials
Parallel parking strikes fear into many learners’ hearts, but it’s actually quite manageable once you break it down. We recommend finding a quiet residential street with plenty of space between parked cars to start your practice.
Key reference points make all the difference:
- Pull alongside the front car, keeping about arm’s length distance
- When your wing mirrors align, stop and engage reverse
- Turn the steering wheel fully to the left (or right, depending on which side)
- Watch for your car’s rear corner to clear the front car’s bumper
Start slowly and don’t worry about getting it perfect straight away. Most learners need dozens of attempts before feeling confident.
Practice with cones or empty boxes first. This takes the pressure off and helps you understand the car’s movement patterns without worrying about scratching someone’s motor.
The secret is consistent reference points. Once you find what works for your height and seating position, stick with those same markers every time.
Bay Parking Techniques
Bay parking comes in two flavours: forward and reverse. We always recommend practising reverse bay parking more, as it’s trickier but gives you better visibility when leaving.
For reverse bay parking:
- Drive past your chosen bay until your car’s door mirrors align with the bay’s entrance
- Stop, engage reverse, and turn the wheel fully towards the bay
- Watch your mirrors carefully and adjust as needed
- Straighten up once you’re mostly in the space
Forward bay parking is more straightforward but requires careful positioning. Approach slowly and use your bonnet’s corners to judge the bay’s width.
Empty car parks are perfect for practice. Sunday mornings at supermarkets often provide plenty of space. Set up makeshift bays with cones or ask a family member to guide you through the movements.
Remember, you’ve got time during your driving test. Rushing leads to poor positioning and unnecessary stress.
Reversing Around a Corner
This manoeuvre tests your ability to control the car while moving backwards around a bend. It’s all about smooth steering and constant observation.
The technique we teach:
- Pull up just past the corner you’ll reverse around
- Check all around for pedestrians, cyclists, and other cars
- Reverse slowly, keeping close to the kerb
- Turn the steering wheel gradually as you follow the corner’s curve
Your biggest challenge will be judging the right moment to start turning. Too early and you’ll mount the kerb. Too late and you’ll swing too wide.
Practice on quiet residential streets with gentle corners first. Avoid main roads or anywhere with heavy foot traffic until you’re completely comfortable.
Use all your mirrors constantly, but don’t forget to look through the rear window too. The driving test examiner wants to see you checking properly for hazards.
Keep your speed dead slow throughout. There’s no prize for finishing quickly, and control is far more important than speed.
Three-Point Turn Approach
The three-point turn (sometimes called a turn in the road) lets you change direction completely on a narrow street. It’s often the manoeuvre that catches people off-guard because it requires quick decision-making.
Here’s our step-by-step method:
- Stop on the left, check all around thoroughly
- Turn the steering wheel fully right before moving forward
- Drive across slowly, stopping just before the opposite kerb
- Full lock left, reverse back while watching for traffic
- Straighten up and drive forward to complete the turn
The key is observation. Check everywhere before each movement because you’ll be blocking the entire road temporarily.
Choose a quiet, wide road for practice. Narrow streets make this manoeuvre much harder and more stressful while you’re learning.
Don’t panic if you need more than three movements. Even experienced drivers sometimes need four or five turns on particularly narrow roads. The examiner won’t fail you for taking extra movements if you’re being safe and controlled.
Smart Strategies for Practising Manoeuvres
Setting clear objectives for each practice session and choosing the right locations makes all the difference when refining your manoeuvring skills. We’ll explore how to maximise your practice time and track your development effectively.
Setting Session Goals
Before we turn the key, let’s decide what we want to achieve. Random practice rarely leads to real improvement.
Pick one specific manoeuvre per session. If we try to tackle parallel parking, bay parking, and reversing around corners all in one go, we’ll spread ourselves too thin. Focus breeds confidence.
Your driving instructor or ADI can help identify which manoeuvre needs the most attention. They’ve watched you attempt these skills during lessons and know exactly where you struggle.
Set measurable targets for each outing:
- Complete three successful parallel parks without hitting the kerb
- Reverse into a bay space within two attempts
- Perform the manoeuvre without excessive steering corrections
Write these goals down before you start. It keeps both you and your supervising driver focused on what matters most.
Time limits work wonders too. Spend 20-30 minutes on one manoeuvre rather than rushing through multiple skills. Quality beats quantity every single time.
Choosing Ideal Practice Locations
The right practice spot can transform a frustrating session into a breakthrough moment. We need places that match our current skill level.
Start with empty car parks. Supermarket car parks on quiet Sunday mornings offer perfect conditions. You’ll find marked bays for practice without the pressure of other drivers waiting.
Industrial estates work brilliantly for manoeuvres too. These areas typically have wider roads and less foot traffic than residential streets.
Gradually increase difficulty as confidence grows:
| Skill Level | Best Locations | What to Practice |
|---|---|---|
| Beginner | Empty car parks | Basic bay parking, getting feel for controls |
| Developing | Quiet residential roads | Parallel parking between two cars |
| Advanced | Busier streets with supervision | Real-world conditions, tighter spaces |
Your supervising driver knows local areas well. Ask them to scout locations during the week so practice time isn’t wasted driving around looking for suitable spots.
Avoid these common location mistakes: practising on hills before mastering flat surfaces, choosing spaces that are too tight for your current ability, or picking areas with heavy pedestrian traffic.
Tracking Improvement and Reflecting
Progress feels invisible without proper tracking. We recommend keeping a simple practice journal in your phone or a small notebook.
Record these details after each session:
- Which manoeuvre you practised
- How many attempts were successful
- Specific mistakes that occurred
- What felt easier than last time
This information proves invaluable when discussing progress with your driving instructor. They can adjust upcoming lessons based on your independent practice results.
Ask your supervising driver for honest feedback. They’ll spot habits you don’t notice yourself. Maybe you’re consistently steering too early during parallel parking or not checking mirrors enough.
Weekly reflection sessions work wonders. Look back at your practice notes and identify patterns. Are you making the same mistake repeatedly? Is one particular manoeuvre improving faster than others?
Share these insights with your ADI during your next lesson. They can provide targeted advice and perhaps demonstrate techniques that address your specific challenges.
Celebrate small victories along the way. The first time you complete a manoeuvre without guidance from your supervising driver deserves recognition. These moments build the confidence you’ll need for test day.
Navigating Real-World Scenarios
Real driving conditions present challenges you won’t find in quiet car parks or empty side roads. Practising on actual test routes and mastering complex traffic situations like multi-lane roundabouts and narrow residential streets builds the confidence you need for test day success.
Practising on Driving Test Routes
Getting familiar with your local test routes gives you a massive advantage. Most test centres use the same roads repeatedly, so knowing these areas inside out helps reduce nerves on the big day.
Start by identifying common test route features:
- School zones with 20mph limits
- Residential areas with parked cars
- Dual carriageways for independent driving
- Shopping centres with busy car parks
We recommend practising during different times of day. Morning rush hour presents different challenges than quiet Sunday afternoons. You’ll encounter varying traffic densities and parking situations.
Focus on the tricky bits that catch many learners out. These might include:
- Narrow roads where you need to give way
- Awkward mini-roundabouts
- Steep hills with traffic lights
- One-way systems in town centres
Remember the legal requirements when practising outside lessons. Your supervisor must be over 21 and have held their full UK licence for at least three years.
Handling Multi-Lane Roundabouts
Multi-lane roundabouts often leave learner drivers feeling overwhelmed. The key is understanding lane discipline and signal timing before you even approach.
Lane selection rules:
- Left lane: First exit (turning left)
- Right lane: Third exit or beyond (turning right)
- Any lane: Second exit (straight ahead) on most roundabouts
Approach speed matters enormously. We suggest slowing down early so you have time to read road markings and assess traffic flow. Don’t rush your decision making.
Signal timing follows this pattern:
- Signal left when passing the exit before yours
- Check your mirrors before changing lanes
- Give way to traffic already on the roundabout
Practice at quieter times first. Sunday mornings or late evenings give you space to build confidence without pressure from impatient drivers behind you.
Watch for cyclists and motorcyclists. They’re harder to spot but have the same right of way as larger vehicles.
Tackling Busy Junctions
Complex junctions demand quick decision making and excellent observation skills. These intersections often feature multiple traffic lights, filter lanes, and pedestrian crossings all at once.
Preparation starts well before the junction:
- Check road signs early for lane guidance
- Position yourself in the correct lane
- Reduce speed to give yourself thinking time
- Keep scanning for pedestrians and cyclists
Yellow box junctions catch many drivers off guard. Never enter unless your exit is clear, even if the lights are green. Getting stuck in the middle creates problems for everyone.
Traffic light sequences vary between junctions. Some have filter arrows, others use full green phases. Spend time observing the pattern before committing to a move.
Right turns across traffic require extra patience. Wait for a safe gap rather than forcing your way through. It’s better to wait for the next light cycle than risk an accident.
Practice these junctions when traffic is lighter. Early mornings or school holidays give you breathing space to master the layout without pressure.
Manoeuvring in Narrow Streets
Narrow residential streets present unique challenges that test your car control and spatial awareness. These roads often have cars parked on both sides, leaving barely enough room for two vehicles to pass.
Priority rules become crucial here. Give way to oncoming traffic when there’s an obstruction on your side. Don’t try to squeeze through gaps that are too tight.
Key techniques for narrow streets:
- Use your door mirrors to judge width
- Slow right down, around 10-15mph
- Stop and reverse if you’ve misjudged a gap
- Flash your lights to thank other drivers who wait
Parked cars create blind spots where children or pets might step out. We always recommend extra caution near schools, playgrounds, and residential areas.
Reversing in tight spaces requires patience and multiple reference points. Use parked cars, lamp posts, and kerb lines to help judge your position.
Don’t let other drivers pressure you into rushing. Take your time, use your mirrors constantly, and remember that confident, safe driving impresses examiners more than speed ever will.
Adapting to Different Conditions
Learning to drive in various conditions helps you become a safer, more confident driver. Weather changes and different times of day each bring unique challenges that require specific skills and awareness.
Day and Night Driving Experience
Night driving feels completely different from daytime practice. Your visibility drops dramatically, and you’ll need to rely more on your headlights and street lighting.
Start practicing at dusk when there’s still some natural light. This gives you a gentler introduction to reduced visibility. As darkness falls, you’ll gradually adjust to using your lights effectively.
Key night driving skills to practice:
- Using dip and main beam headlights properly
- Judging distances with limited visibility
- Reading road signs and markings in low light
- Managing glare from oncoming traffic
Choose quiet residential streets for your first night sessions. Empty car parks work brilliantly for practicing manoeuvres like reverse parking when visibility is poor.
Your depth perception changes at night, making it harder to judge how close you are to kerbs or other cars. Take extra time with each manoeuvre. There’s no shame in going slower whilst you build your confidence.
Building Confidence in Bad Weather
Bad weather doesn’t have to be scary if you prepare properly. Each weather condition teaches you valuable skills about vehicle control and road awareness.
Fog requires the most caution. Visibility can drop to just a few metres very quickly. Practice using fog lights correctly and learn to maintain safe following distances when you can barely see ahead.
Snow and ice create slippery conditions that test your steering and braking skills. Find a safe, empty space like a car park to practice gentle acceleration and braking. This helps you understand how your car responds when grip is limited.
Essential bad weather equipment:
- Working windscreen wipers and washers
- Properly inflated tyres with good tread
- Clear windows and mirrors before setting off
- Emergency kit with torch and warm clothes
Strong winds affect your steering, especially when passing large vehicles or crossing bridges. Practice maintaining steady control when crosswinds try to push your car sideways.
Driving Safely in Rain
Rain creates two main hazards: reduced visibility and slippery road surfaces. Both require you to adjust your driving style significantly.
Wet roads increase your stopping distance dramatically. What normally takes 23 metres to stop at 30mph can take 36 metres or more on wet tarmac. Always leave extra space between you and the car ahead.
Your windscreen wipers become crucial in rain. Make sure they work properly before practicing. Adjust your speed so the wipers can keep up with the rainfall intensity.
Rain driving techniques:
- Reduce speed on wet roads
- Use gentle steering inputs to avoid skidding
- Test your brakes gently on quiet stretches
- Avoid sudden acceleration or harsh braking
Standing water creates aquaplaning risks where your tyres lose contact with the road surface. If you feel the steering go light, ease off the accelerator gently and keep the steering wheel straight.
Practice makes you comfortable with these conditions. Start with light rain during quieter periods, then gradually build up to heavier downpours as your skills improve.
Safety, Supervision, and Legal Essentials
When you practice driving manoeuvres outside lessons, specific legal requirements protect both you and other road users. The right supervision and insurance coverage create a safe learning environment where you can build confidence.
The Role of a Qualified Supervising Driver
Your supervising driver must be over 21 and hold a full UK driving licence for at least three years. This isn’t just a legal box to tick. An experienced supervisor brings years of real-world driving knowledge to your practice sessions.
We recommend choosing someone patient and calm. Your supervising driver should understand basic driving principles and feel comfortable giving clear instructions. They don’t need to be a qualified ADI or driving instructor, but they should know the current Highway Code.
Key qualities to look for:
- Patience during tricky manoeuvres
- Clear communication skills
- Up-to-date knowledge of driving rules
- Calm demeanor in stressful situations
Your supervisor acts as your safety net. They can take control if needed and spot potential hazards you might miss. Choose someone who makes you feel supported, not anxious.
Insurance and Legal Requirements
Before you start any practice session, sort out the paperwork. Your supervising driver’s insurance must cover learner drivers, or you’ll need separate learner driver insurance.
Essential legal requirements:
- Display L plates (or D plates in Wales) on front and rear
- Valid insurance covering learner drivers
- Supervising driver meets age and licence requirements
- Practice only on public roads (not private car parks without permission)
Ring your insurance company to confirm coverage. Some policies automatically include learner driver provision, whilst others require additional cover. Don’t assume you’re covered.
L plates must be clearly visible and removed when a qualified driver takes over. We suggest keeping spare plates in the car, as they can fall off or get damaged.
Staying Calm and Safe During Practice
Practice sessions work best when everyone stays relaxed and focused. Start with quiet car parks or empty roads before attempting complex manoeuvres in busy areas.
Plan your route beforehand. Know where you’ll practice each manoeuvre and have backup locations ready. Avoid rush hour traffic and challenging road layouts until you’re more confident.
Safety tips for practice sessions:
- Take regular breaks to avoid fatigue
- Start with easier manoeuvres first
- Practice in good weather conditions initially
- Keep sessions to 1-2 hours maximum
Your supervising driver should remain alert throughout the session. Unlike a driving instructor with dual controls, they rely on verbal guidance and quick reactions. Communication between you both prevents dangerous situations from developing.
Remember that making mistakes is normal. Every qualified driver once struggled with parallel parking or three-point turns.
Frequently Asked Questions
Learning manoeuvres outside structured lessons brings up plenty of practical questions. We’ve gathered the most common concerns about perfecting your reversing, parallel parking, clutch control, and staying composed when the pressure’s on.
What’s the best way to get comfortable with reversing into tight spots?
Start with wide spaces and gradually work your way down to smaller ones. We find that practising in empty car parks gives you the freedom to make mistakes without any pressure.
Set up markers using cones or even plastic bottles to create boundaries. This helps you judge distances better and builds your spatial awareness naturally.
Use your mirrors constantly, but don’t forget to physically turn and look through your rear window. Your neck might feel stiff at first, but this habit becomes second nature with practice.
Take your time with each attempt. Rushing only creates bad habits and unnecessary stress.
How can I perfect my parallel parking outside of my driving lessons?
Find a quiet residential street with plenty of space between parked cars. We recommend practising during off-peak hours when there’s less traffic pressure.
Use the reference points your instructor taught you, but remember that different cars have different dimensions. What works in your instructor’s car might need slight adjustments in your practice vehicle.
Start by practising the manoeuvre in slow motion. Break it down into individual steps rather than trying to complete it smoothly right away.
Don’t worry if you need several attempts. Even experienced drivers sometimes need to readjust their position.
Is there a trick to mastering the three-point turn on my own?
Choose roads that are genuinely wide enough for the manoeuvre. Narrow streets make this much harder and can damage your confidence.
Focus on getting your car perpendicular to the kerb on your first turn. This gives you the best angle for completing the manoeuvre efficiently.
Keep your speed incredibly low throughout the entire process. We’re talking about barely moving, especially when you’re close to the kerb.
Remember that it’s perfectly acceptable to take more than three movements if needed. The goal is safety and accuracy, not speed.
Could you offer some advice on improving observation skills for manoeuvres?
Develop a systematic checking routine before every manoeuvre. Look all around your vehicle, check mirrors, and scan for pedestrians, cyclists, and other road users.
Practice the “all-round observation” technique your instructor taught you. Make it deliberate and obvious, especially during your test.
Watch for children playing near parked cars or people walking dogs. These situations require extra caution and patience.
Don’t just look, but actually process what you’re seeing. A parked car with its engine running might pull out unexpectedly.
What are some effective techniques for staying calm during challenging manoeuvres?
Take deep, steady breaths before starting any manoeuvre. If you feel flustered, stop the car safely and give yourself a moment to reset.
Remember that other road users were once learners too. Most people are patient and understanding when they see L-plates.
Break complex manoeuvres into smaller, manageable chunks. Focus on completing one step well before moving to the next.
Celebrate small victories. Successfully reverse parking on your third attempt is still an achievement worth recognising.
Can you recommend exercises to help with clutch control for smoother manoeuvres?
Find a gentle slope in a safe location and practise hill starts. This really develops your feel for the biting point.
Try the “clutch crawling” technique on flat ground. Let the clutch up slowly until you feel the car wanting to move forward, then hold it there while steering with just engine power.
Practice finding the biting point with the handbrake on. This helps you understand exactly where your clutch engages without worrying about rolling backwards.
Don’t rest your foot on the clutch pedal when you’re not using it. This creates bad habits and can damage the clutch mechanism over time.