How to Perform a Controlled Emergency Stop: Step-by-Step Guide for Learner Drivers
Learning how to perform a controlled emergency stop might feel daunting at first, but it’s one of the most important skills we can master as drivers. Whether you’re preparing for your driving test or simply want to become a safer driver, understanding this technique could make all the difference in a real emergency situation.
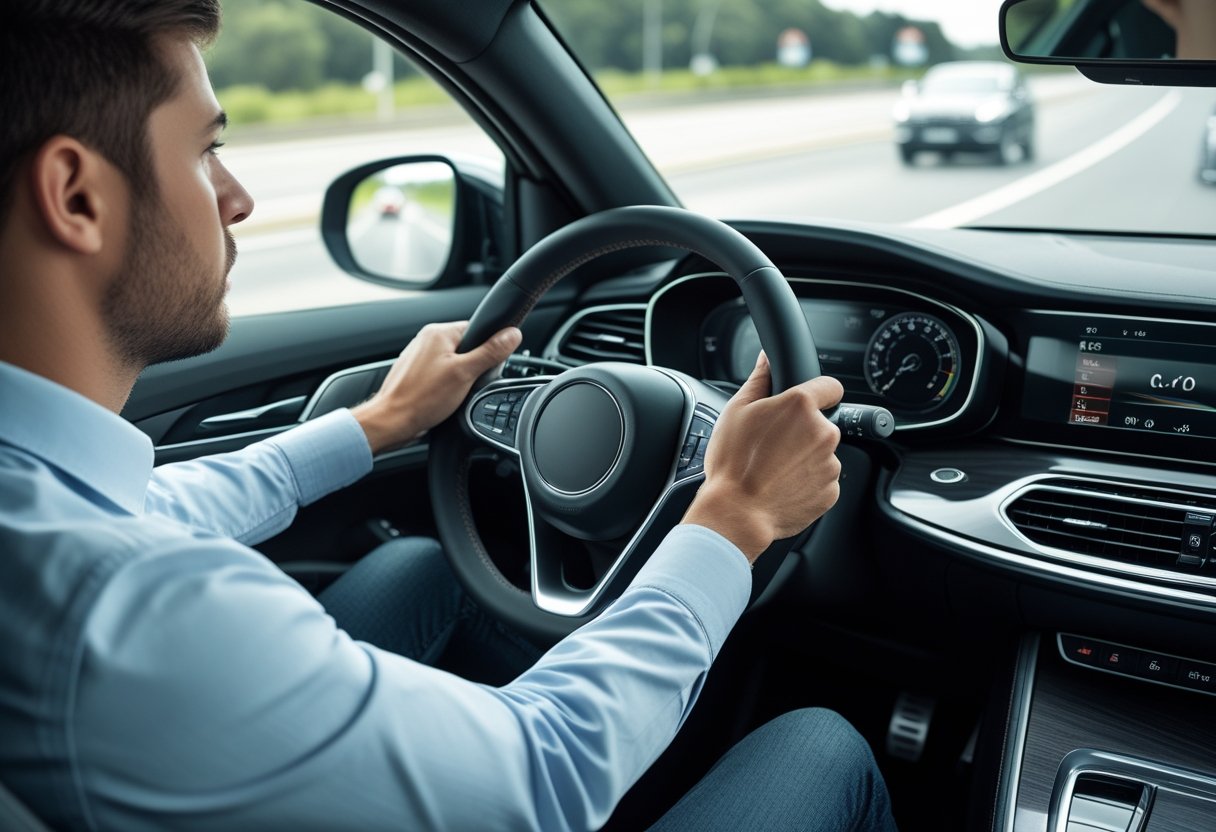
To perform a controlled emergency stop, we need to brake firmly and steadily whilst maintaining full control of the vehicle, keeping both hands on the steering wheel and coming to a complete stop without skidding or swerving. The key lies in acting quickly but staying calm, which comes naturally once we’ve practised the proper technique.
We’ll guide you through everything from the basic principles to advanced techniques, covering the differences between ABS and non-ABS vehicles, common challenges you might face, and what examiners look for during your driving test. By the end of this guide, you’ll feel confident about handling emergency situations and ready to demonstrate this crucial skill with complete control.
Understanding the Controlled Emergency Stop

Learning how to perform an emergency stop properly could save lives, including your own. We’ll explore what makes a stop “controlled” and when you might need this crucial skill on the roads.
What Is an Emergency Stop?
An emergency stop is when you bring your vehicle to a halt as quickly and safely as possible. It’s also called a controlled stop because you must maintain full control throughout the manoeuvre.
The key difference between a normal stop and an emergency stop is speed and urgency. In an emergency, you need to react within seconds rather than gradually slowing down.
During your driving test, there’s a one in three chance you’ll be asked to demonstrate this skill. Your examiner will raise their hand and shout “STOP” to simulate a real emergency situation.
Cars with ABS (Anti-lock Braking System) make this easier. You press both the clutch and brake pedals simultaneously. The ABS prevents your wheels from locking up, which helps you avoid skidding.
For older cars without ABS, you brake first and press the clutch just before stopping. This prevents the engine from cutting out too early and causing you to coast.
Most driving school cars have ABS, so you’ll likely use the first method during your test.
When Might You Need to Stop Suddenly?
Real emergencies happen when we least expect them. A child might dart into the road chasing a football. A cyclist could swerve unexpectedly into your path.
Other drivers sometimes make sudden moves without warning. They might brake hard in front of you or pull out from a side road at the last moment.
Weather conditions can create emergency situations too. You might hit a patch of ice or encounter sudden flooding that requires immediate stopping.
Animals often appear without notice, especially in rural areas. Deer, dogs, or even farm animals can create dangerous situations that demand quick reactions.
Traffic lights failing or emergency vehicles needing right of way are other scenarios where you’d need to stop quickly.
The common thread in all these situations is that good observation usually prevents most emergencies. However, when prevention isn’t possible, knowing how to stop safely becomes vital.
Key Principles of a Controlled Stop
Speed of reaction matters most when performing an emergency stop. The moment you receive the signal, you need to act decisively without hesitation.
Keep both hands firmly on the steering wheel throughout the stop. This helps you maintain control if the car starts to skid or swerve slightly.
Your braking technique should be firm and steady, not jabbing or pumping the pedals. Apply strong, consistent pressure to bring the car to a smooth halt.
After stopping, engage the handbrake and put the car in neutral. Before moving off again, check all around you using your mirrors and looking over your shoulders for blind spots.
Don’t panic if you stall during the manoeuvre. This happens frequently and won’t necessarily count against you on your test. Simply restart the engine and carry on.
The examiner watches for three main things: quick reactions, vehicle control, and proper safety checks afterwards. Master these elements and you’ll perform emergency stops confidently both in tests and real driving situations.
Essential Preparation Before You Practise
Getting ready to practise your controlled emergency stop involves two crucial elements: having proper guidance from a qualified instructor and finding the right location to learn safely.
The Role of Your Driving Instructor
Your driving instructor plays a vital part in teaching you the emergency stop technique properly. We strongly recommend learning this manoeuvre with a qualified instructor before attempting it on your own.
Why instructor guidance matters:
- They’ll explain the correct sequence of actions
- They can identify unsafe roads or traffic conditions
- They’ll help you understand what the driving test examiner expects
Your instructor will typically introduce the emergency stop during your lessons, well before your driving test. They’ll choose quiet roads with good visibility to start practising. This gives you time to build confidence with the technique.
Key instructor responsibilities:
- Demonstrating proper hand and foot positioning
- Teaching you when to press the clutch and brake
- Showing you how to check mirrors before moving off again
Remember, there’s a one in three chance you’ll face this manoeuvre during your driving test. Your instructor knows exactly what the examiner looks for and can help you avoid common mistakes.
Choosing a Safe Practice Environment
The location where you practise your emergency stop makes a huge difference to your safety and learning progress. We need to be extremely careful about where this manoeuvre takes place.
Ideal practice locations include:
- Quiet residential roads with minimal traffic
- Empty car parks (with permission)
- Training grounds specifically designed for learner drivers
Avoid these dangerous areas:
- Busy main roads or dual carriageways
- Roads with poor visibility around bends
- Areas with pedestrians or cyclists nearby
Your instructor will always check that the road behind is clear before giving you the signal to stop. This safety check prevents other vehicles from colliding with your car during the manoeuvre.
Weather conditions also affect your choice of practice location. Wet or icy roads require extra caution and longer stopping distances. We recommend postponing practice sessions during severe weather conditions until roads become safer.
Step-by-Step Emergency Stop Technique
Mastering the emergency stop requires quick thinking and precise vehicle control. We’ll break down each critical moment, from spotting danger to bringing your car to a complete stop safely.
Quick Reaction and Hazard Detection
Your reaction time can make all the difference between a close call and a collision. The moment you spot a hazard, your brain needs to process the danger and send signals to your hands and feet.
Most drivers take about 1.5 seconds to react to unexpected situations. That might sound quick, but at 30mph, you’ll travel roughly 13 metres before even touching the brake pedal.
Keep your eyes moving constantly whilst driving. Don’t fixate on one spot ahead. Instead, scan the road, pavements, and junctions regularly.
Watch for sudden movements from pedestrians, cyclists, or other vehicles. Children playing near roads are particularly unpredictable.
Your instructor will likely give you the emergency stop signal without warning during practice. They might raise their hand or tap the dashboard and shout “stop!”
Stay alert but relaxed. Tension actually slows down your reactions, so keep your shoulders loose and hands ready on the steering wheel.
Maintaining Steering Control
Keep both hands firmly planted on the steering wheel throughout the entire manoeuvre. Your natural instinct might be to grip tighter, but avoid white-knuckling it.
Maintain the 10-and-2 or 9-and-3 hand positions we’ve practised. This gives you maximum control if the car starts to slide or skid during heavy braking.
Never take your hands off to brace yourself or cover your face. The steering wheel is your lifeline to keeping the car straight and stable.
If your car has ABS (which most modern cars do), you might feel the steering wheel vibrate or pulse during hard braking. This is completely normal and means the system is working properly.
Don’t fight against any steering corrections the car makes. ABS helps prevent wheel lockup, but you still need to guide the vehicle’s direction.
Look where you want the car to go, not at the hazard you’re trying to avoid. Your hands will naturally follow your eyes.
Applying the Brake and Clutch Pedals
The braking technique depends on whether your car has ABS or not. Most learner cars have this safety feature, which changes how you use the pedals.
With ABS: Press the clutch pedal and brake pedal simultaneously with firm, steady pressure. Don’t pump the brakes – just press and hold them down.
Without ABS: Press the brake pedal first with progressive pressure, then push the clutch pedal down just before the car stops completely.
Your right foot does the heavy lifting here. Place the ball of your foot on the brake pedal and press down with controlled force.
Don’t stamp on the brakes like you’re trying to put your foot through the floor. Firm and decisive works better than panicked and harsh.
The clutch pedal prevents the engine from stalling during the stop. Get this timing right, and you’ll maintain better control throughout the manoeuvre.
Stopping the Car Safely
A proper emergency stop should bring your car to a halt in the shortest distance possible whilst maintaining complete control.
You’ll know you’ve done it correctly when the car stops quickly but doesn’t skid, swerve, or slide sideways.
Once you’ve stopped, immediately put the car in neutral and apply the handbrake. This secures the vehicle and shows your examiner you’ve completed the manoeuvre.
Take a moment to compose yourself, then prepare for the next phase: moving off again safely.
Before rejoining traffic, perform thorough all-round observations. Check your mirrors, look over both shoulders for blind spots, and ensure no vehicles are approaching too quickly.
The examiner will expect you to move away smoothly when it’s safe to do so. Don’t rush this part – careful observation matters more than speed.
Remember, stalling during an emergency stop isn’t necessarily a test failure. Losing control of the steering or skidding dramatically would be much more serious.
Differences Between ABS and Non-ABS Vehicles
The way you perform an emergency stop depends entirely on whether your car has an anti-lock braking system. ABS changes how you should brake and what you can expect during the stopping process.
How to Stop with Anti-Lock Braking System (ABS)
When your car has ABS, emergency stopping becomes much more straightforward. You can press the brake pedal as hard as possible without worrying about the wheels locking up.
Keep both hands firmly on the steering wheel throughout the entire process. This gives you maximum control over your vehicle’s direction.
Press the brake pedal with full force and maintain that pressure until you come to a complete stop. Don’t pump the brakes or ease off the pressure. The ABS does all the work for you.
Press the clutch pedal down just before you stop completely. This prevents your engine from stalling when the car comes to rest.
With ABS, you can still steer around obstacles whilst braking hard. The system prevents wheel lock-up, so your tyres maintain their grip on the road surface. This means you keep steering control even during maximum braking.
The beauty of ABS is its simplicity. You don’t need to modulate brake pressure or worry about technique. Just brake as hard as you can and let the technology do the rest.
Emergency Stops Without ABS
Cars without ABS require more skill and finesse during emergency stops. You must control the brake pressure yourself to prevent the wheels from locking.
Grip the steering wheel firmly with both hands before you start braking. You’ll need good control to handle any potential skidding.
Apply firm brake pressure, but not so hard that the wheels lock up. If you feel the wheels starting to lock or the car beginning to skid, ease off the brake pedal slightly until the wheels start rotating again.
Once the wheels are turning properly, reapply the brakes with less force. This technique is called cadence braking.
Listen and feel for signs of wheel lock-up. You might hear the tyres squealing or feel the car sliding rather than slowing down smoothly.
Press the clutch pedal just before stopping to prevent the engine from stalling, just as you would with ABS.
Without ABS, emergency stops require practice and good judgement. The key is finding that sweet spot where you’re braking as hard as possible without losing tyre grip.
Recognising ABS Activation
When ABS activates, it creates distinctive sensations that might surprise you if you’re not expecting them. Don’t let these normal reactions alarm you during an emergency stop.
You’ll feel a pulsing or vibrating sensation through the brake pedal. This happens because the ABS rapidly applies and releases brake pressure many times per second.
The system makes noise when it’s working. You might hear grinding, buzzing, or clicking sounds coming from under the bonnet or near the wheels.
The brake pedal might feel harder or softer than usual as the ABS adjusts pressure automatically. Some drivers describe it as the pedal “fighting back” against their foot.
These sensations tell you the ABS is doing its job properly. Keep your foot pressed firmly on the brake pedal despite these feelings.
Most modern cars show an ABS warning light on the dashboard when you first start the engine. This light should go out after a few seconds, confirming the system is ready to work.
Managing Common Challenges During an Emergency Stop
Even with solid preparation, emergency stops can throw unexpected curveballs your way. Skidding wheels, engine stalls, and sudden panic are the most frequent hurdles we encounter during these high-pressure moments.
Avoiding and Handling Skidding
Skidding happens when your tyres lose their grip on the road surface during hard braking. This typically occurs when we apply the brakes too forcefully or hit a slippery patch.
Prevention is your best defence. Check your tyre condition regularly and avoid sudden, harsh movements on the brake pedal. Even during emergency stops, we want controlled pressure rather than slamming our foot down.
If you feel the car starting to skid, don’t panic. Release the brake pedal slightly to allow the wheels to regain their grip on the road. You’ll feel when the tyres start gripping again.
Modern cars with ABS help prevent skidding automatically. The system pulses the brakes for you, which creates that familiar vibrating sensation through the pedal. Don’t fight this feeling, it’s working exactly as designed.
Without ABS, your technique matters more. Apply firm pressure but stay alert for any signs of wheel lock-up. The moment you sense skidding, ease off and reapply the brakes more gently.
Using Cadence Braking
Cadence braking is your manual version of ABS. We use this technique when driving older vehicles or when ABS fails to prevent skidding.
The process involves quickly releasing and reapplying the brake pedal in short bursts. Think of it as pumping the brakes rapidly rather than holding them down continuously.
When you feel the wheels lock up, lift your foot off the brake pedal immediately. Wait for the wheels to start turning again, then reapply pressure. Repeat this sequence until you come to a complete stop.
Practice makes perfect with this technique. The timing takes some getting used to, which is why we recommend practising in empty car parks with a qualified instructor.
Modern drivers rarely need cadence braking thanks to ABS systems. However, knowing this skill builds confidence and prepares you for any vehicle you might drive.
Coping with Stalling or Panic
Engine stalls during emergency stops are completely normal, especially for new drivers. The key is staying calm and focused on stopping safely first.
Your clutch timing matters most. Press the clutch pedal down just before the car comes to a complete halt. Pressing it too early reduces your control through coasting.
If the engine stalls, don’t worry about restarting it immediately. Focus on bringing the car to a safe stop, applying the handbrake, and selecting neutral gear.
Panic is your biggest enemy during emergency stops. Take a deep breath and trust your training. Remember that examiners choose safe locations for test emergency stops.
Keep both hands firmly on the steering wheel throughout the entire process. This maintains your control and helps prevent panic from taking over your actions.
Completing the Manoeuvre and Rejoining Traffic
Once you’ve brought your vehicle to a complete stop, the next steps involve securing your car properly and then safely rejoining the flow of traffic. These final actions require careful observation and smooth execution to demonstrate full control.
Applying the Handbrake and Selecting Neutral
After your car comes to a complete stop, we need to secure it immediately. Pull the handbrake firmly to prevent any rolling. This shows your examiner you understand proper vehicle control even after stopping.
Next, select neutral gear if you’re driving a manual car. Keep your foot on the clutch during this process. For automatic vehicles, you can shift to park if the stop will be lengthy.
Don’t rush these steps. Your examiner wants to see deliberate, controlled actions that show you’re thinking about safety first.
The handbrake is particularly important here. It prevents your car from creeping forward or backward, which could happen even after a controlled stop.
Observations Before Moving Off
Before rejoining traffic, we must check our surroundings thoroughly. Start with your mirrors, checking rear and side mirrors for approaching vehicles.
Look over your shoulder to check blind spots. This physical check is vital because mirrors can’t show everything.
Check ahead for pedestrians, cyclists, or other hazards. The road conditions may have changed while you were stopped.
Pay special attention to stopping distance requirements for other vehicles. Don’t pull out if approaching cars can’t stop safely.
Listen for approaching vehicles too. Sometimes you’ll hear engines or horns before seeing the vehicle itself.
Smoothly Rejoining the Road
When it’s safe to move, release the handbrake first. This prevents the car from jerking forward unexpectedly.
Apply gentle pressure to the accelerator while maintaining steering control. Keep both hands positioned correctly on the wheel throughout this process.
Signal your intentions clearly if you need to move into traffic lanes. Other road users need to understand your movements.
Build up speed gradually to match the flow of traffic. Sudden acceleration can surprise other drivers and reduce your control.
Keep checking your mirrors as you rejoin the traffic flow. Stay aware of vehicles around you, especially those that might be adjusting their speed or position because of your manoeuvre.
Emergency Stops in the UK Driving Test
Emergency stops appear in roughly one in three UK driving tests, making them a crucial skill to master. The controlled stop demonstrates your ability to react quickly whilst maintaining full control of your vehicle under pressure.
The Examiner’s Procedure and Expectations
Your examiner will pull you over on a quiet road before explaining the emergency stop procedure. They’ll tell you something like: “Shortly, I’ll ask you to carry out the emergency stop. When I raise my hand and say ‘stop’, I want you to stop as quickly and safely as possible.”
The test typically happens on a 30mph road with minimal traffic. Your examiner chooses the timing and location carefully for safety reasons.
What we’re looking for:
- Immediate response to the examiner’s signal
- Firm, progressive braking without locking the wheels
- Both hands firmly gripping the steering wheel
- Straight-line stopping without swerving
- Clutch control (manual cars) to prevent stalling
Your examiner wants to see controlled urgency, not panic. We need to demonstrate that you can handle genuine emergencies whilst keeping everyone safe.
After stopping completely, wait for instructions before moving off again. The examiner will assess your observation and control during this restart too.
Difference Between Real-Life and Test Scenarios
Test emergency stops differ significantly from real-world situations. During your driving test, you know the stop is coming and you’re on a quiet, controlled road.
Test conditions:
- Pre-warned scenario on safe roads
- No actual danger present
- Examiner choosing optimal timing
- Controlled environment with minimal traffic
Real emergencies involve:
- Genuine surprise and stress
- Actual hazards like children or animals
- Potentially busy roads or poor conditions
- Split-second decision making
The test scenario feels quite artificial compared to genuine emergencies. However, it builds the muscle memory and technique you’ll need when facing real dangers.
Practice helps bridge this gap. We recommend rehearsing emergency stops in various conditions with your instructor, not just during mock test situations.
Remember that real-life emergency stops should only happen when absolutely necessary. Poor weather, worn tyres, or busy roads all affect your stopping ability dramatically.
Recent Changes in Test Emphasis
The DVSA has shifted focus towards practical hazard awareness rather than just mechanical technique. Modern driving tests emphasise observation skills and hazard perception alongside physical control.
Current priorities include:
- Mirror checks before and after stopping
- Hazard awareness and road positioning
- Vehicle technology understanding (ABS systems)
- Smooth recovery and moving off safely
Examiners now pay closer attention to your awareness of other road users during the manoeuvre. We must show we’re thinking about vehicles behind us and potential risks.
The controlled stop has evolved from a simple braking test into a comprehensive assessment of emergency response skills.
Modern cars with ABS require slightly different techniques. You can brake harder without fear of wheel lock, but the pedal feel differs from older vehicles.
Your examiner understands these technological differences and adapts their expectations accordingly. Focus on demonstrating safe, controlled responses rather than worrying about specific pedal pressures.
Frequently Asked Questions
Emergency stops can feel nerve-wracking, but knowing the proper steps makes all the difference. These common questions cover everything from maintaining control during sudden braking to handling tricky weather conditions safely.
What steps should I take to ensure a safe emergency stop whilst driving?
Keep both hands firmly planted on the steering wheel at all times. This gives you the best control over your vehicle’s direction.
Press the brake pedal down firmly and steadily. Don’t slam it down, but apply strong, consistent pressure to bring your car to a quick stop.
Depress the clutch pedal fully if you’re driving a manual car. This prevents the engine from stalling during the stop.
Apply your handbrake immediately once you’ve stopped. This secures your vehicle and prevents it from rolling.
Stay calm throughout the entire process. Panic leads to mistakes, so take a deep breath and focus on the task at hand.
Can you walk me through the process of executing a quick stop without skidding?
Modern cars with ABS brakes make this much easier than older vehicles. Press the brake pedal firmly and let the system do its work.
You’ll feel the brake pedal pulsing under your foot with ABS. This is completely normal and means the system is preventing wheel lock.
For cars without ABS, use cadence braking instead. Pump the brake pedal quickly and gently to avoid locking the wheels.
Keep your steering wheel straight and don’t try to swerve. Sudden steering movements during heavy braking can cause you to lose control.
Avoid looking at the hazard you’re trying to avoid. Focus on where you want the car to go, not what you’re trying to miss.
What’s the best way to maintain control of my vehicle during a sudden halt?
Grip the steering wheel with both hands in the ten and two position. Never take your hands off the wheel during an emergency stop.
Keep your arms slightly bent and relaxed. Tense muscles make it harder to steer smoothly if you need to make small adjustments.
Don’t lift off the brake pedal once you’ve applied it. Maintain steady pressure until you’ve come to a complete stop.
Keep your eyes focused ahead on your intended path. Your car tends to go where you’re looking.
Stay seated properly in your driving position. Don’t lean forward or shift your weight, as this can affect your control.
How do I alert other drivers when I need to perform an abrupt stop?
Unfortunately, there’s no time to signal other drivers during a true emergency stop. The situation requires immediate action without delay.
Your brake lights will automatically illuminate when you press the brake pedal. This warns drivers behind you that you’re slowing down.
Some modern cars have emergency brake light systems. These make your brake lights flash rapidly during hard braking to grab attention.
After you’ve stopped safely, put your hazard lights on. This alerts other road users that there’s a problem or obstruction.
If you’ve stopped in a dangerous location, try to move your car to safety. Get off the carriageway if possible, but only when it’s safe to do so.
Are there any specific techniques for handling a vehicle during an emergency braking situation in wet conditions?
Allow extra distance between you and other vehicles in wet weather. This gives you more time to stop safely without needing harsh braking.
Reduce your speed before you encounter hazards. Slower speeds mean shorter stopping distances on slippery surfaces.
Apply the brakes more gently than you would in dry conditions. Wet roads reduce tyre grip, making skidding more likely.
Avoid sudden steering inputs whilst braking hard. The combination of braking and steering can overwhelm your tyres’ grip.
Check your tyres regularly for proper tread depth. Worn tyres are particularly dangerous in wet conditions and increase stopping distances.
What should I do immediately after performing an emergency stop to avoid further incidents?
Apply your handbrake straight away to secure your vehicle. This prevents your car from rolling if you’re on a slope.
Switch on your hazard warning lights to alert other drivers. This is especially important if you’ve stopped in an unexpected location.
Check your mirrors and surroundings before moving off again. Look for approaching traffic, pedestrians, or other hazards.
Take a moment to compose yourself if you’re shaken. It’s perfectly normal to feel rattled after an emergency situation.
Move your car to a safer location if needed, but only when traffic conditions allow. Sometimes it’s better to stay put and wait for help.
Signal clearly when you’re ready to rejoin traffic. Use your indicators and check your blind spots thoroughly before pulling away.
Ready to Book Driving Lessons?
LPOD Academy offers intensive driving courses across the UK. Find your nearest location: